How To Make a Simple Worm Bin
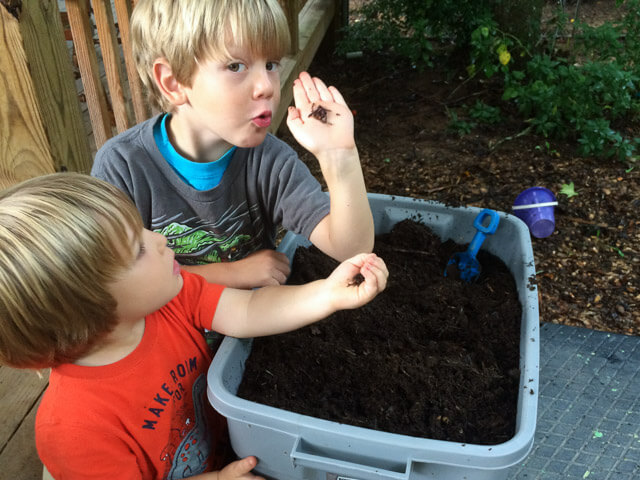
“Wormies!” Kids love worms. At least, mine do. 🙂 The boys helped me make this simple worm bin last fall, and the worms have been busy eating our food waste ever since. Here’s a step-by-step tutorial of how to make a worm bin with kids.
Our worm bin project started with a dish of earthworms in the back of my fridge. They needed a home. I’d bought them at the pet store to feed our baby bird (a story for another time). Now, the bird was gone and the worms were chilling.
I’d also wanted to start worm composting (aka vermicomposting) again, since our earthworm colony hadn’t made the move from New Mexico with us the year before.
Benefits of a Worm Bin
If worms gross you out a little, let me share a few of the benefits we’ve seen from our own worm bin.
- Worms eat “trash” and create castings (poop!) that is rich in nutrients. Our small bin can handle a pound of food waste
- Worm castings (poop!) is fantastic for the garden and the houseplants.
- An indoor worm bin works year-round.
- A worm bin fits our crazy life…i.e., if I don’t pay attention to it for a few weeks, the worms are usually still fine.
- Instant kid fun! I move the bin outside, open the lid, hand the kids a trowel, and they’re engrossed in finding and watching the worms.
How to Make a Simple Worm Bin
This is a quick and simple indoor worm bin that kids can help you build. It’s a great way to try out raising worms for the first time. If you like it, you may want to build or purchase a larger system that can handle more of your food waste.
I’ll break it down into four parts:
- Prep Work. Depending on your child’s age and abilities, you may want to gather materials and do power tool work in advance.
- Fill the Bin. Create a home for your worms next. Everyone can help with this step.
- The Worms. My kids’ favorite part! Let’s meet the worms and move them into your bin.
- Upkeep. In this part, you’ll learn how to keep your worms happily turning your trash into treasure.
The composting process feels a little magical. Waste goes in, and a little while later, rich compost comes out. Voila! Worms make the whole process even more fun.
Prep Work
Depending on your child’s age and abilities, you may want to do this part in advance.
1. Gather supplies and tools.
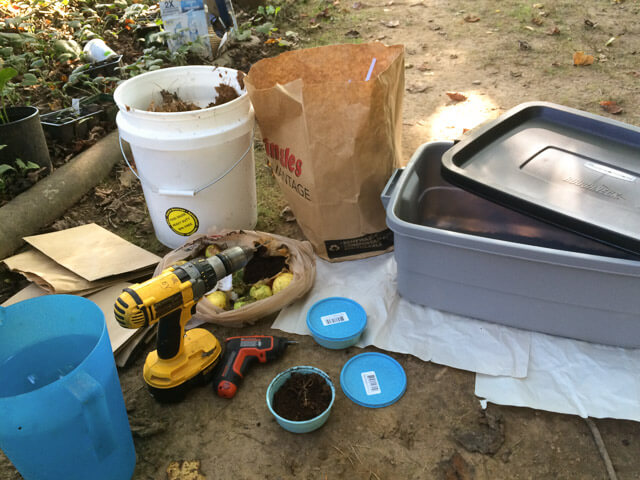
Supplies
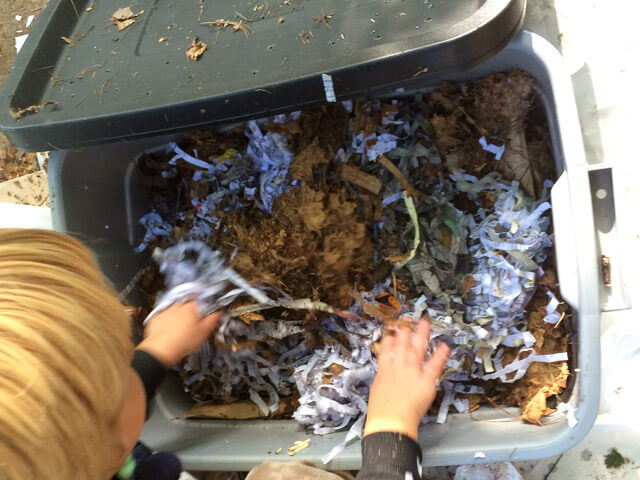
- Opaque plastic bin – A shallow bin works best because composting worms stay in the top few inches of soil (vs. the nightcrawlers that burrow deep underground). Worms prefer a dark space, so avoid containers with clear sides. We used a 10 gallon Rubbermaid container like this one.
- Bedding – You’ll need enough to fill your bin half to three-fourths full. (This allows room for you to add bedding as you add food scraps.) We used a 5-gallon bucket full of each of the following:
- Waste paper, shredded (black and white newsprint, junk mail, office paper)
- Dry leaves
- Food – Start with 1-2 cups of food for your worms. After they’ve eaten it, you can add about one half pound of food per pound of worms each day.
- Kitchen scraps – Avoid meat, dairy, citrus, and heavily spiced/salted foods.
- Weeds
- Soil -A handful of soil or sand will provide grit the worms need to grind food in their gizzard.
- Water in a spray bottle or watering can
- Paper bags or full sheets of paper, lightly crumbled
OR
Small gravel and a piece of fine mesh screening cut to fit inside your bin - Red wiggler worms – We started with two small containers, but it took a few months for the worm population to grow. You could start with 1-2 pounds of worms for a 10-pound bin.
Tools
- 5 gallon bucket
- Drill with a 1/16″ drill bit (A sharp awl or ice pick will also work.)
- Safety glasses
2. Drill air holes.
Safety first! Put on your safety glasses. Insert the 1/16″ drill bit into your drill.
Put the top on the bin and make holes every 2-3 inches.
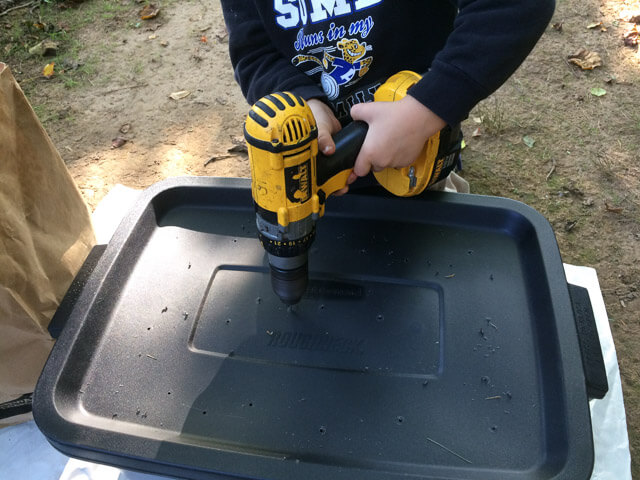
Turn the bin sideways. On all four sides, make a row of holes, about 2 inches apart and 2 inches from the top.
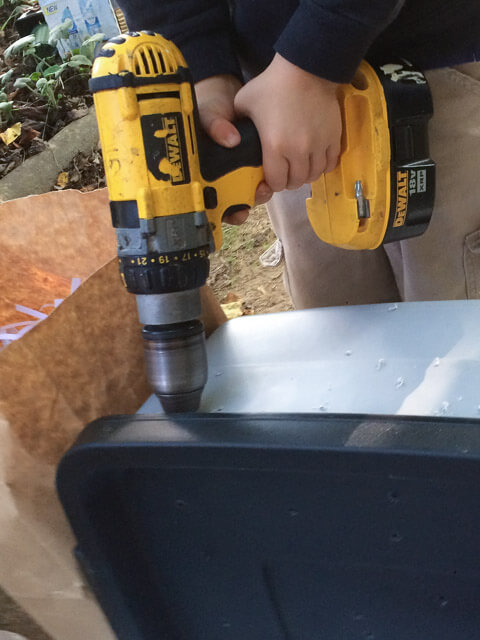
Shake any plastic shavings out into the trash.
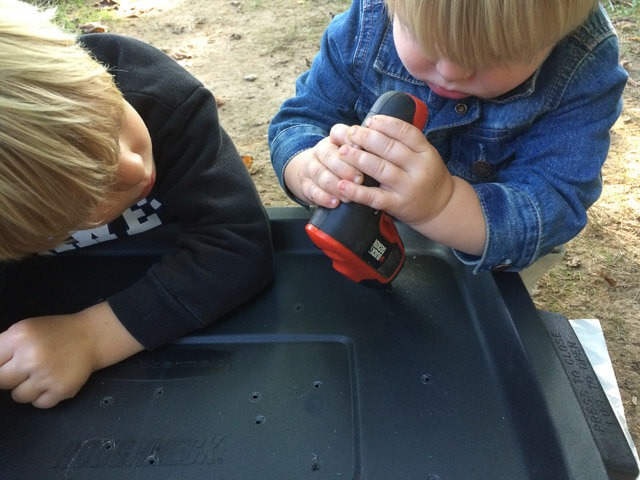
A small electric screwdriver (without a drill bit!) is a great way for even the smallest helpers to get in on the tool fun.
3. Chop your food waste. (optional)
This step is not required, but the worms will be able to eat your waste more quickly and completely if you get the breakdown process started.
You can chop food up using a knife, a food processor, or a blender. The smaller the pieces, the faster worms can eat it!
Freezing is another way to get worm food ready. The action of freezing breaks down cell walls in the fruits and veggies. (Think of how mushy frozen fruit is when thawed.) You can use your freezer to store excess food until it goes into your worm bin. Thaw the frozen food before putting it into the bin and pour off excess liquid (unless your bin is on the dry side).
Part 2: Fill the Bin
4. Prepare bedding.

If needed, tear or shred your paper and/or leaves into smaller pieces.
Get the bedding wet with your spray bottle or watering can. If you dip the bedding into water, squeeze out any extra. You want bedding to be damp, but not dripping. (Think of a wrung-out sponge.)
5. Put in a drainage layer.
The drainage layer keeps the bedding off of any liquid that leaches to the bottom of the bin. It also helps with air circulation.
We used a few lightly crumpled paper bags. You could also use a couple inches of small gravel with a layer of fine screen on top.
Some bins have drainage holes on the bottom with a tray underneath to catch or a spigot to drain the leachate. Worm leachate can be diluted and used as a liquid fertilizer.
We are careful to keep our bin from getting too wet, and we haven’t noticed much leachate in the bottom. As long as we add fresh bedding occasionally, the worms don’t seem to mind not having the drainage holes.
6. Add 3-4 inches of damp bedding.
7. Add 1-2 cups of food in one corner.
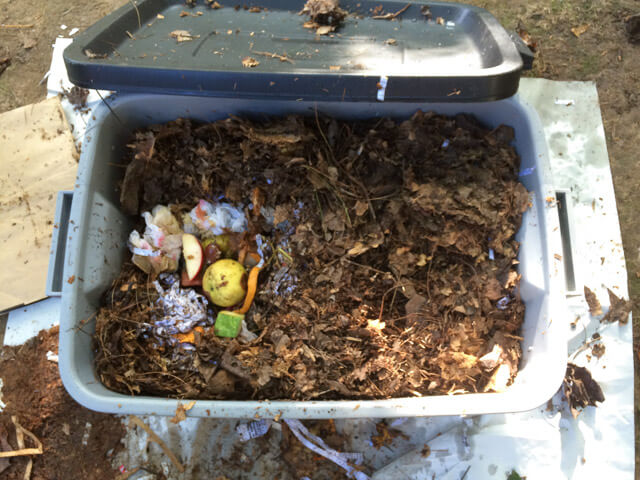 You may want to mark the corner with a piece of tape, a stick or a rock to make it easy to find when you want to see if your worms are ready for more food.
8. Sprinkle a handful of soil on top.
9. Cover with another layer of damp bedding.
Make the top layer at least 2 inches thick. It acts as a filter for smells and make it difficult for fruit flies to lay eggs in your food waste.
Part 3: The Worms
10. Meet your worms and add them to your bin.
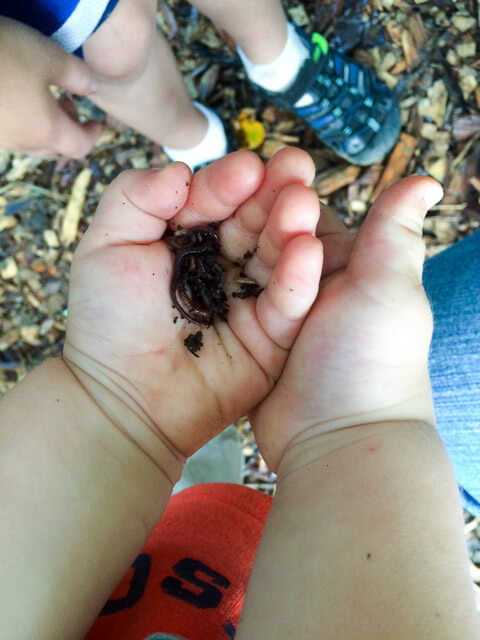
Open up the container of worms and get a few out. Be sure to wash your hands before and after handling worms.
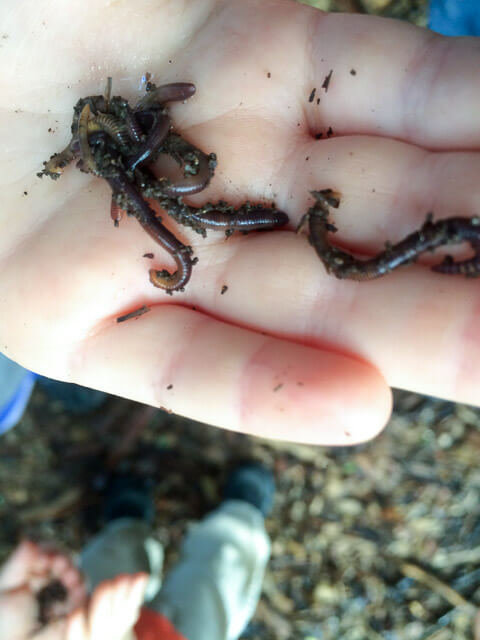
As you play with the worms, you can point out their segments and feel the stiff little hairs that help them move through the soil. Earthworms are amazing!
Did You Know?
- Worms have no eyes, no ears, and no teeth.
- Worms breathe through their skin! If their skin dries out, they die.
- In ideal conditions, worms can eat their weight in food each day.
- There are more than 2,700 different types of earthworms on Earth!
- One acre of land can be home to over 1 million earthworms!
- Worms lay their eggs inside cocoons that are a little smaller than a grain of rice. Two to four tiny worms hatch from each cocoon.
When you’re ready to add the worms to your bin, put them in a corner away from the food. This gives them time to adjust to their new home. Then, they’ll move to the food.
Part 4: Simple Worm Bin Upkeep
Here’s how you can keep your worms happy:
Add food. As your worms eat the food you’ve put in the bin, you can add more. Place the new food in a new corner or area each time. When conditions are ideal, one pound of worms can eat around one-half pound of food per day.
Check the moisture regularly. If the bin gets too wet or too dry, the worms may die. As an unwanted bonus, a wet bin is usually stinky!
- For a wet bin, mix in some dry bedding. It will absorb the extra moisture.
- For a dry bin, spritz with water or add damp bedding.
Keep it dark. Cover the worm bin with its lid when you’re not looking at or tending your worms.
Put them in a place that’s not too hot, not too cold. Worms like a temperature of 59-77° F. Don’t place the worm bin in the direct sun or in freezing temperatures.
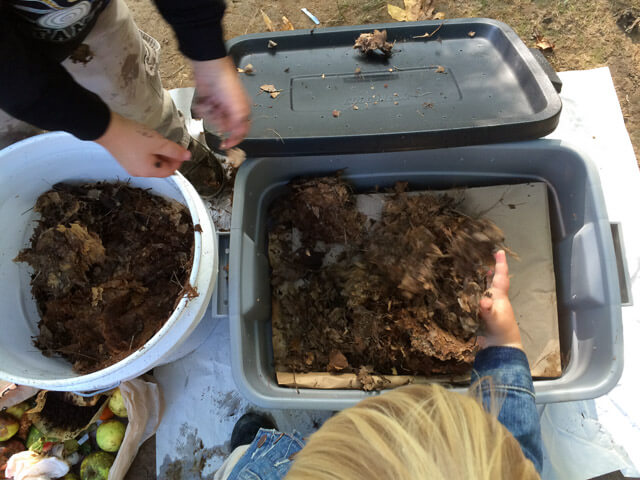
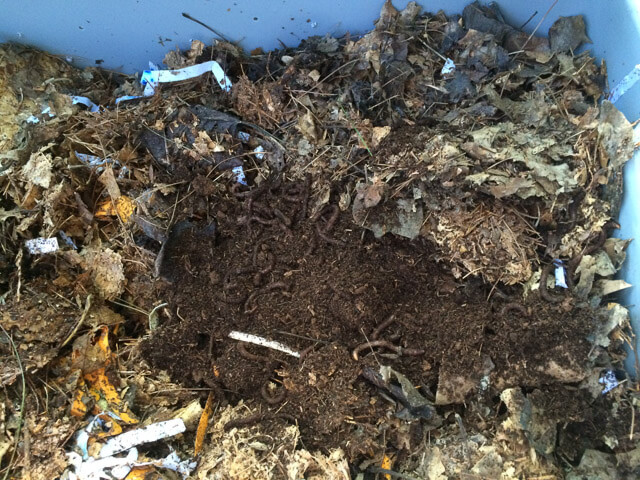
Harvesting the worm castings
As the worms consume your food waste, they’ll leave behind dark, crumbly castings. When most of the bedding has been consumed, and what is left is practically unrecognizable, it’s time to harvest the castings and use them in your garden. We use two different methods for harvesting:
- Move ‘Em On Over. This is the Migration Method. Push the worm bin contents to one side of the bin. On the other side, add fresh bedding and fresh food. Close the bin and wait a week or two. The worms will move to the fresh food. This method requires a little patience, but allows the worms to do the work. After all the worms have moved to the new bedding, remove the castings. After you have removed the castings, add new bedding and food to the empty side, or you can choose to wait to add the food when you are ready for the worms to move again.
- Dump and Sort. This is the easiest and most immediately satisfying method. Just dump the contents of the bin out on a clean tarp or table with newspaper and remove the worms by hand. We like this method the best. There is no real planning or technique involved and our boys love to find the worms. And while the boys sort the worms from the castings, I can replenish the bin with fresh bedding. The worms need to go into fresh bedding and food very soon after sorting. This activity should be done in the shade. The worms will die if exposed to the sun for very long. After the worms are removed, what is left is ready for the garden.
To learn more about harvesting your castings, click here.
If you would like to read a book about worms and vermicomposting, we recommend Worms Eat My Garbage, by Mary Appelhof.
Have you ever composted with worms? We would love to hear about your experience in the comments below.