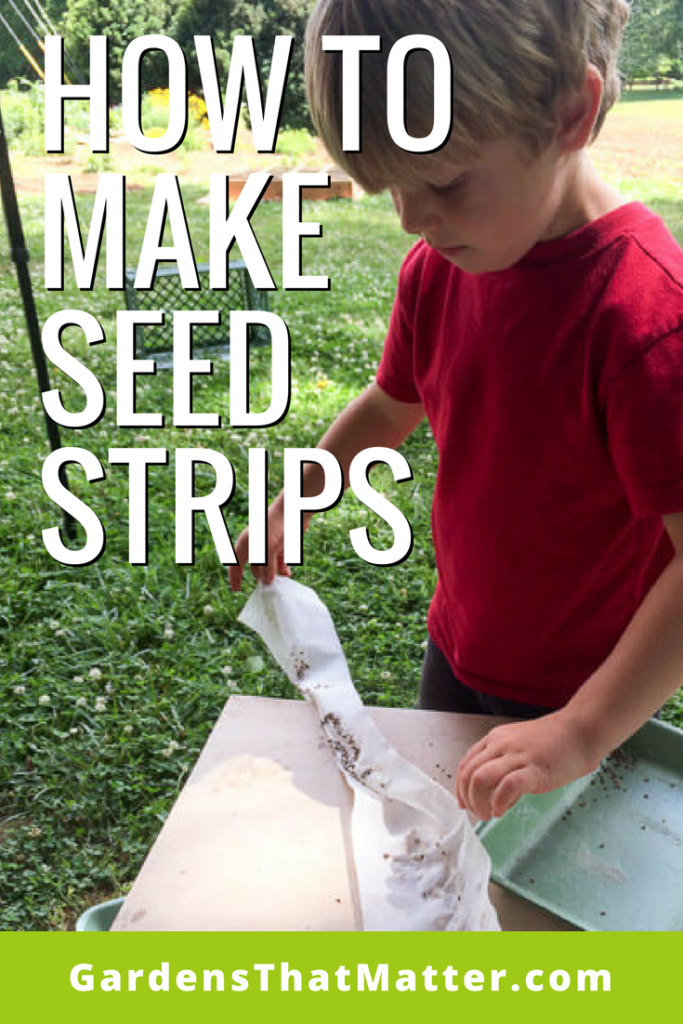
How to Make Seed Strips
This simple technique helps save my sanity when it comes to kids and tiny seeds.
Planting seeds with preschoolers usually goes something like this…
Me: “Hey guys! We’re going to plant SEEDS today. Let’s go outside.”
Flurry of getting dressed, finding shoes, and changing at least one diaper.
Boy 1: “I’m going to go find a shovel!” (Runs out.)
Boy 2: “Maaama! Meemu (the stuffed emu) go with me?”
Me: “Not right now. Meemu needs to stay inside, so he won’t get muddy. We do need to take these seeds out. Want to carry them?”
Boy 2: “Yep!”
(Note: Do NOT ask your toddler to carry open packages of seeds, thinking to yourself, “It’ll be fine since I’ll be right with him.” It is highly likely you’ll get distracted by another child/pet and find yourself leading a miniature Easter egg hunt for tiny seeds on the ground. Trust me.)
Me: “Okay, we’re going to plant them in this part of the garden. Try to keep your feet on the edge–don’t step in the bed….oops, that’s the bed, keep your feet back here.”
Boy 1: “I want seeds! I want seeds, pleeeeease!”
Boy 2: “Me seeds! Me seeds, pleeeease!”
I give each one a few pinches in their palm.
Me: “Okay, we’re going to drop the seeds one by one in a line along… what? You’re already done? Where did your seeds go?”
Boys laugh and run to play nearby. I half-heartedly spread pinches of the seeds/soil over the intended planting area and hope for the best. If I’m lucky, I’ll remember to come back a couple weeks later to thin the crowded plants.
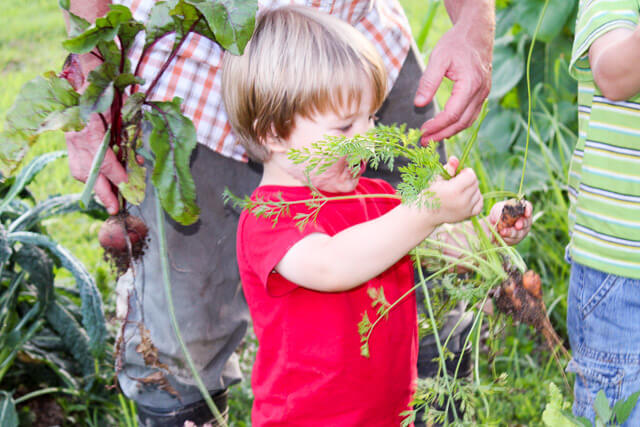
Planting seeds with the kids is sometimes a frustrating experience. With larger seeds like beans and squashes, I can follow behind to tuck in or move misplaced seeds. With small seeds like carrots and lettuce, well, ARGH!
Seed strips to the rescue!
A seed strip, or seed tape, is a simple way to get small seeds spread out (almost) properly. The process slows the kids down and lets us talk a little about how seeds work and why we plant them in different ways.
We use a flour-based glue to attach seeds along a stip of thin paper. We place the strips under a thin layer of soil in the garden, water them well, and watch for the seedlings emerge a week or so later.
I get less seed waste and less crowded plants. Plus, a few extra minutes to talk with the boys about seeds.
The boys get to do gluing, shaking, and digging!
Everyone is happy. 😉
Tutorial
Here are step-by-step instructions for making your own seed strips.
Click here to watch a video tutorial for this activity over on Facebook.
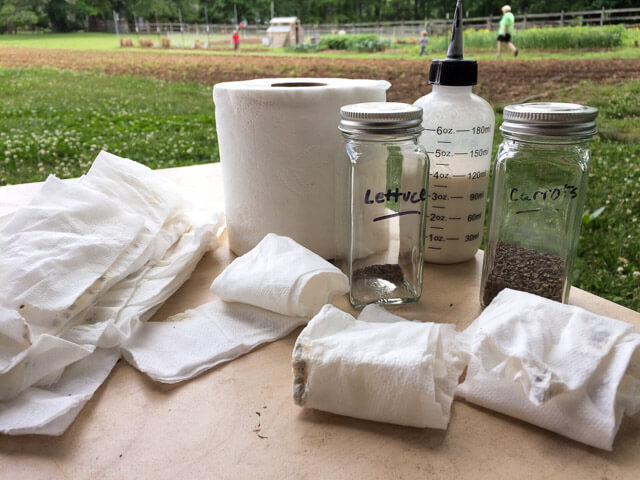
What you will need:
- A roll of toilet paper
- Bottle with small tip (A hair color applicator or recycled glue bottle works well. The tip of a ketchup/mustard bottle is too large.)
- 1 tablespoon flour
- 1 tablespoon water, plus extra water to get glue to desired consistency.
- Seeds (I find this project most helpful for small seeds, like lettuce, carrots and radishes.)
- Tray or plate
- Pen or pencil
- Shaker bottle (optional)
- Ruler (optional)
1. Mix the glue.
Put one tablespoon each flour and water into the bottle. Shake to mix well.
Add water a few drops at a time, until you have your desired consistency.
I prefer a thick consistency that is slow to come out of the bottle. The thicker glue seems easier for the boys to work with and dries fairly quickly.
2. Cut strips.
Cut or tear the toilet paper into strips.
You could make thestrips the length of your planting area, if you have enough room on your workspace. You may want shorter strips if you’re working on a smaller table or with smaller children. I asked the boys to count five squares and then tear.
3. Determine seed spacing.
Look at your seed pack to find the planting recommendations.
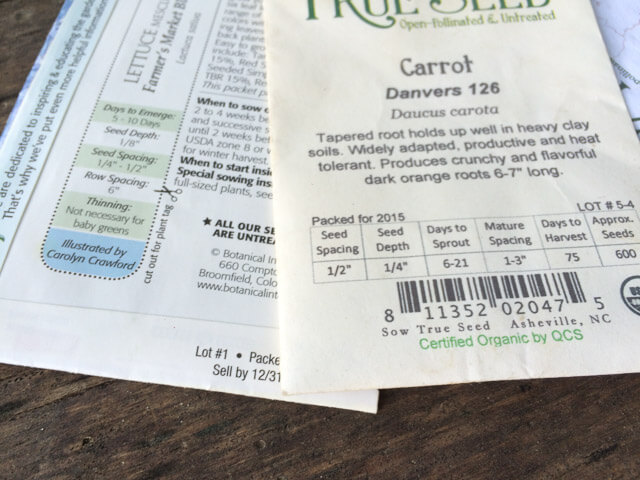
Often, seed packets suggest both a “Seed Spacing” and “Mature Spacing” or “Thinning” distance. I usually go with the larger distance, since I don’t always get back to do the thinning. Plus, I know my kids tend to plant/glue/sprinkle densely!
With older kids, you could use a ruler and pen to mark out the spacing on the strips. With my little guys, I eyeballed it.
4. Add glue to the strips.
Spread out one or several strips on your work surface.
Squeeze drops of glue the strips, spacing them based on what you decided in Step 3.
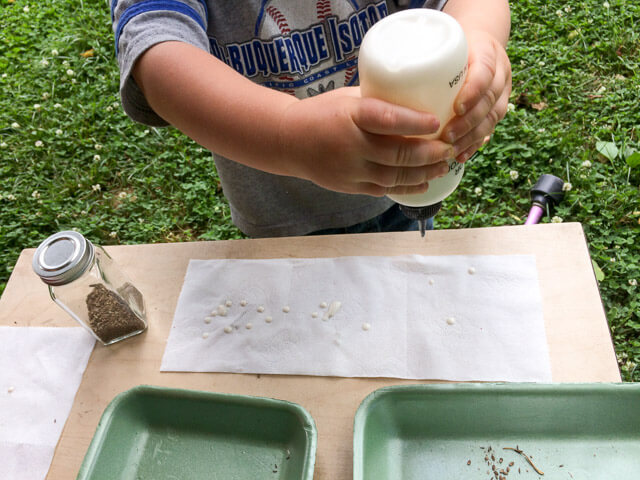
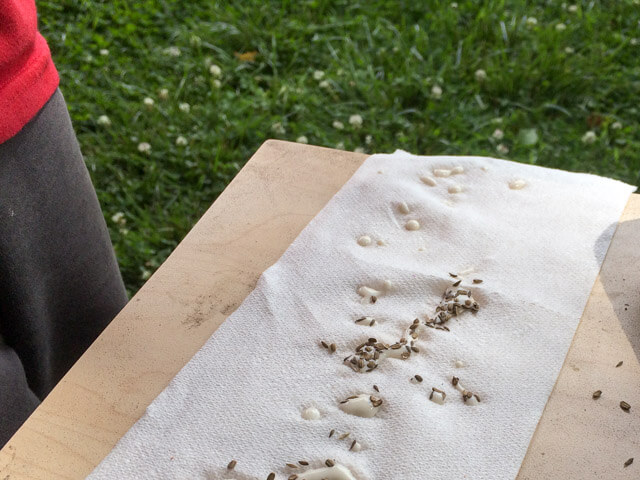
6. Add seeds.
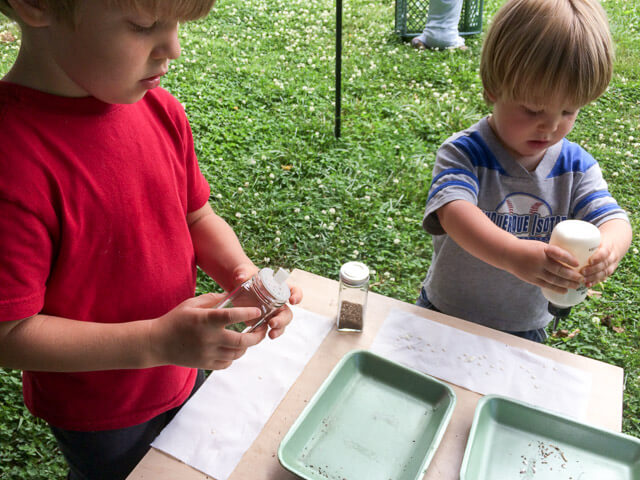
Place seeds on the glue dots. We reused an empty spice jar to make a shaker bottle for this step.
Use the non-writing end of the pen or pencil to gently move seeds into the glue, if needed.
Shake any extras on the tray or plate. You can use these on the next strip.
A tip for carrots – Plant radishes and carrots together on the same strip. The sturdy and fast radish sprouts will break through the paper and soil to make it easier for the carrots to follow a few days later.
7. Label and dry.
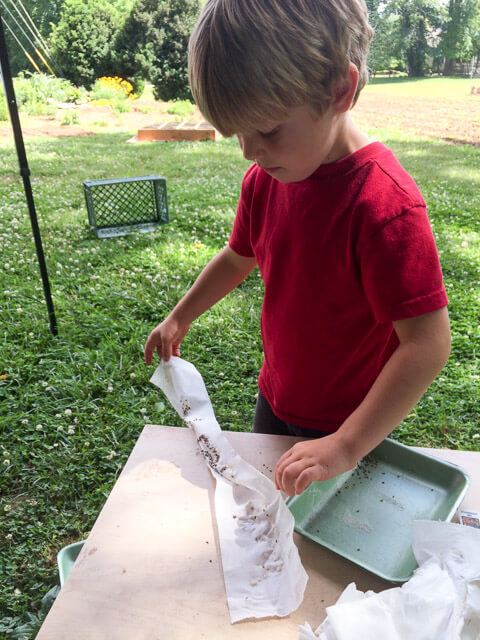
Label each strip with the type of seed(s) you used, especially if you are not going to plant right away.
If you are going to save the strips for later, allow them to dry completely. We folded our strips in half to keep the seeds in place, but you can also lay them flat to dry. Store in a cool, dry place. Moisture can decrease the life span of seeds, so be sure to use them this season.
8. Plant!
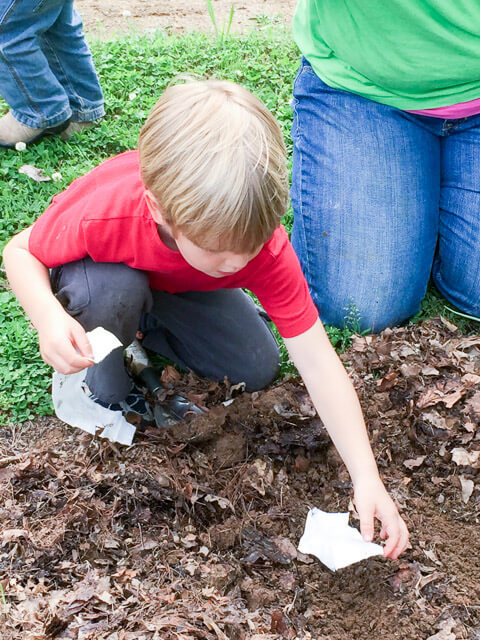
To plant the seed strips, make a shallow trench.
The depth of this trench will vary with the seeds you are using. Carrots and lettuce need 1/4″ or less. Bigger seeds, like beans, will need a deeper trench. Look for “Seed Depth” on your seed packet.
If you’re feeling creative, break apart the strips and plant them in patterns or different shapes.

If you’d like to add mycorhizzal fungi when you plant, this would be the time to sprinkle a liquid inoculant into the furrow.
Sprinkle the soil back on top and press gently to make sure the seeds will have contact with the soil once they sprout.
Water well. You want the strips to be soaked through to make the paper easy for the seedling to push through.
7. Keep the seedbed moist.
Until the seedlings get established, you may need to water shallowly a couple times a day.
You can add a layer of burlap or shade cloth on the surface to help cool the soil. Remove it when leaves appear.
8. Harvest and eat!
Do I always use seed strips when I’m planting?
Nope! I sometimes plant directly while the kiddos are playing nearby. And other times, I invite them to join me and do my best to orchestrate the planting exuberance.
Nonetheless, seed strips are one of my favorite ways to get everyone involved in planting.
Do you have tips or tricks you use when planting seeds?
Tell us about them in the comments below!
Hi there, Great tips by the way and thank
you. I did have a question though. I’m hoping you can answer it for
me since you seem to be pretty knowledgeable about gardening.
Will a DIY vinegar herbicide affect soil acidity? I have a garden bed that I want to use herbacide on but I don’t want to ruin the
soil. If you had some insight I would greatly appreciate it.
Thanks, Rodney! Your DIY vinegar herbicide probably won’t shift soil acidity noticeably for a couple reasons. First, you’re primarily spraying the leaves, not drenching the soil, so the amount that ends up in the soil is fairly small. Second, it takes a LOT of acid/base to shift pH because it’s a logarithmic scale. Plus, the organic matter in healthy soils acts as a buffer against major swings in acidity/alkalinity.
Once you kill the weeds though, remember how nature abhors a vaccuum. Get that bed planted with cover or covered with mulch so you only have to use the vinegar once! 🙂 By the way, I checked out your website, and your landscape work looks lovely. I love those rocky hardscapes mixed with lush plantings!