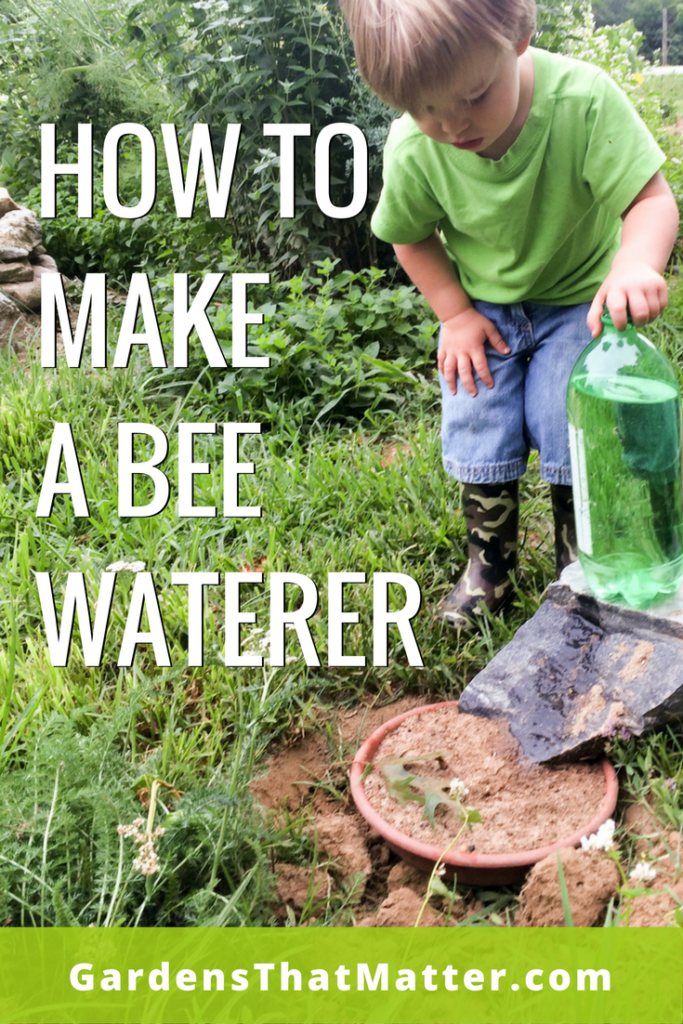
How to Make a Bee Waterer
Give your bees, butterflies and other beneficial insects a refreshing drink without inviting mosquitoes into your yard using this simple waterer.
Summer’s here and it’s time for water play! Don’t you love that feeling of diving into the lake or wading in a cool creek or just sitting with your feet in the kiddie pool?
Any water is a hit with my crowd. How about yours?
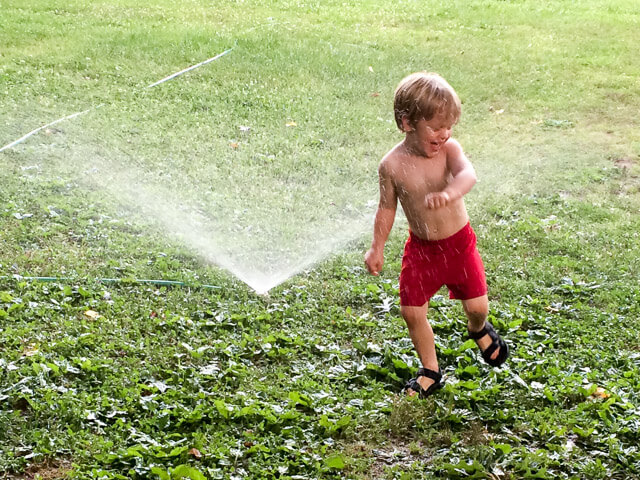
We’re not the only ones looking for water this season. Finding clean water can mean life or death for wildlife.
I really want to build a pond for wildlife. I dream about tadpoles swimming in it, dragonflies patrolling the airspace, bees sipping from atop lily pads, and butterflies puddling on the muddy bank. But, with small children, we’ll wait a couple more years on that project.
In the meantime, I wanted a safe place for bees and butterflies to find water without making a home for mosquitoes. I created a simple waterer using recycled and repurposed materials. You can adapt the design easily for your own garden.
Why do beneficial insects need water?
While many insects get water through food (pollinators from nectar, predators from juicy prey), they still need water available for a variety of reasons.
- Foraging honeybees collect water to dilute honey, regulate humidity, and cool the hive. They tell other bees where to find water, just as they communicate about the best places to gather nectar and pollen.
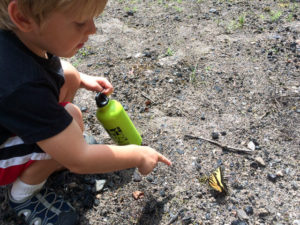 Some insects get salts and nutrients via water sources. Have you seen butterflies gathered around a mud puddle before? It’s usually all males, and biologists think they seek sodium and/or nitrogen to help with breeding. (Learn more and see cool electron microscope pics of butterfly tongues here.)
- Other insects come for mud. For example, native mason bees need mud to cap their nesting holes.
- And then, there are the aquatic insects that live in water during part of their life cycle. Mosquitoes fall into this category, along with dragonflies, damselflies, mayflies, caddisflies, some beetles and many others.
No mosquitoes allowed.
Is it possible to give water to wildlife without making a home for mosquito babies?
The challenge is that these buzzing biters are well-adapted to breed in whatever water is available.
They don’t need much. A generation of mosquitoes can grow up in a water-filled bottle cap, if conditions are right. The larva can survive in the dirtiest water, and they can even breed in temporary puddles sometimes since they go from egg to adult in about a week.
The good news is that you can make your yard inhospitable for mosquitoes. Here’s what you need to do:
- Find and eliminate (or empty) places that can catch rainwater. Think tires, tarps, clogged gutters, kids’ toys, and flower-pot saucers. Remember, a bottle cap of water is enough!
- If you have a bird bath or outdoor water dish for pets, dump and refresh it at least once a week.
- Cover rain barrels and cisterns with solid covers or fine mesh.
- Fill low spots (where water collects) with mulch, sand or pea gravel to cover the water as it soaks into the soil.
- Mosquitoes prefer still water, so a small fountain or pump will discourage them from laying eggs in a small pond.
- In larger ponds and wetlands, encourage mosquito predators, like dragonflies, minnows, and amphibians, to keep mosquito populations under control.
Our bee waterer uses three tactics (a cover, movement and fill) to keep mosquitoes from breeding inside.
One Waterer, Many Variations
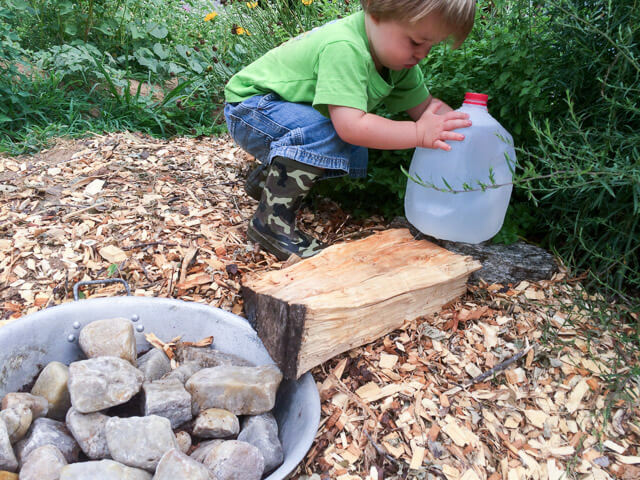
The bee waterer has three parts: a reservoir, a waterway and a basin. Once you know the basics, you can make your own version with materials you have on hand.
Bee Waterer 2.0! Read on for details about the three variations we made.
The Reservoir
This is your water source, and it can be any size from a one gallon jug to a rain barrel. (You could even use a hose or water faucet.) It needs a cover to keep mosquitoes out. The reservoir should be able to release water very slowly (drip…drip…drip). The larger your reservoir, the longer you can go between refills.
The Waterway
This is how the water moves from your reservoir to your basin. Look for something with a fairly flat, rough surface to provide a place where insects can land and drink without drowning.
The Basin
This is where the water collects and gives insects a second place to drink. You need a wide, shallow container filled with sand or soil. The basin should overflow into a well-drained area.
Tutorial
I’ll share the step-by-step creation of our first bee waterer below. We built it about a week ago, and I’ve seen a few beetles and flies using it.
But, I haven’t spotted bees or butterflies yet. Have they not discovered it? Or are the conditions not quite right?
I made two more waterers so that we can compare materials and locations. You can see those variations at the bottom of the post, and we’ll add an update on how they’re being used in a few weeks.
What you will need:
- A gallon jug (clean and empty with a lid)
- A safety pin or needle
- A lighter and candle (optional)
- A log with a flat side (Or you could use a rough-cut plank. Look for something about 6″ wide x 12″ long.)
- A wide, shallow container
- Coconut coir and/or sand to fill the container
- Rocks (optional)
- Water
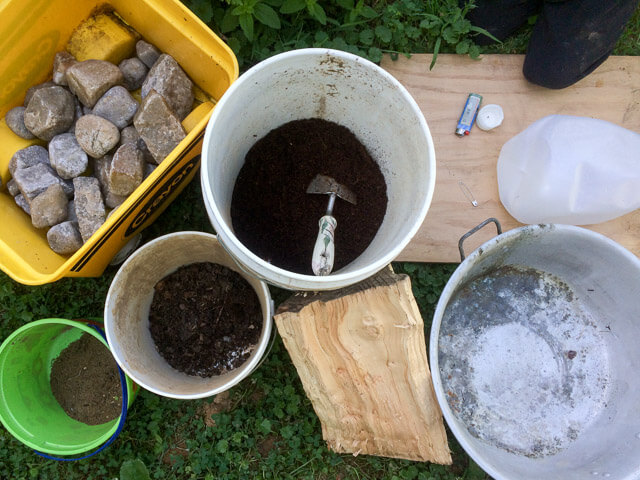
1. Get prepared.
Gather your supplies.
Choose a place for your waterer. You want a location that’s…
- Protected from wind
- In a sunny spot (especially in spring/fall)
- Near flowering plants that pollinators are already visiting
- Convenient for you to refill
We tucked one waterer into our herb spiral and the other two near the faucet in our mini-meadow.
2. Make the reservoir.
Wash and rinse the jug well. (A quick rinse with white vinegar will help remove any soap residue.)
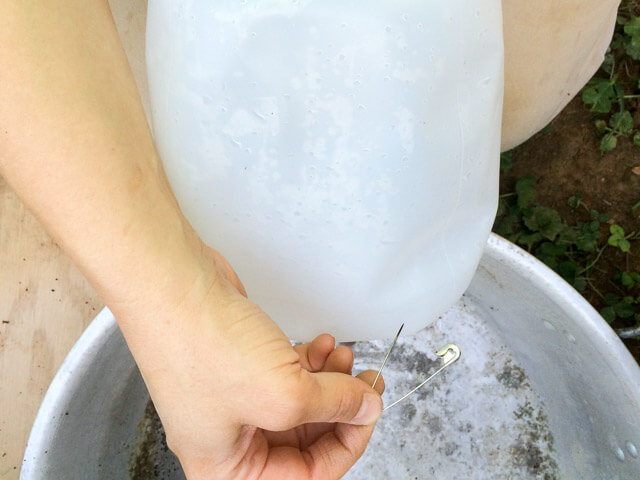
Heat up the needle/pin and poke a tiny hole near the bottom. (Depending on the thickness of your jug, you may be able to pierce it without heating the pin.)
Fill it with water, and put the cap on tightly to slow the drip.
3. Make the basin.
Put several inches of coconut coir and sand into a shallow container.
Then, you can add rocks on top.
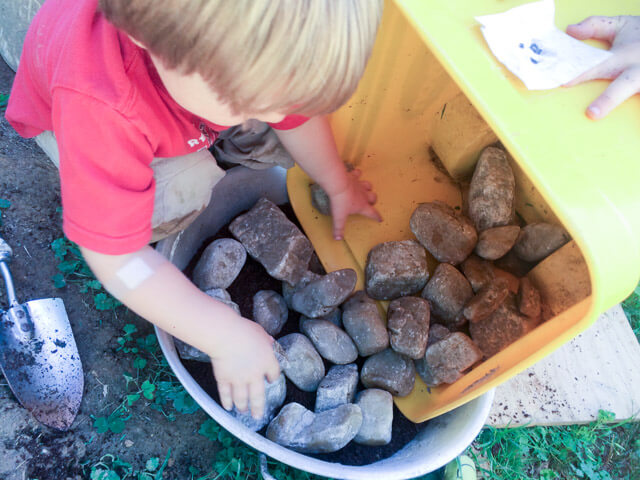
The rocks are optional, but useful if you have rock-collecting kids. 🙂 They also give the insects a sheltered place to land.
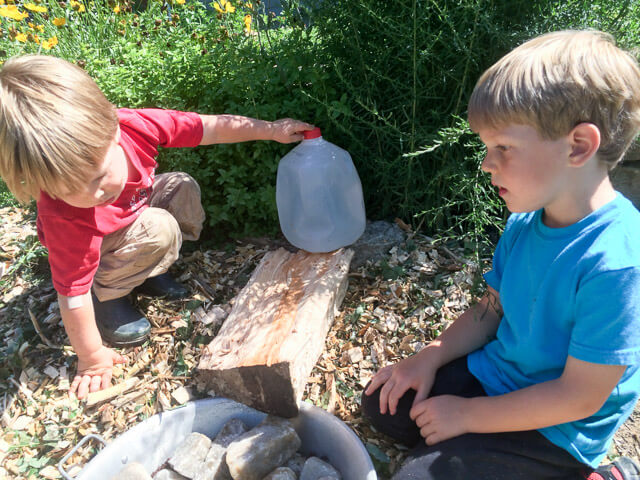
4. Set up your waterer.
Place the reservoir jug on a rock or higher area. Loosen the lid to get it dripping.
Line up the waterway log to catch the drips. Place it at a slight angle, so the water moves down.
Place the basin at the bottom to catch the extra water. Be sure extra water can drain into the soil below without causing a standing puddle. We added a layer of mulch underneath to help with drainage.
5. Monitor and refill as needed.
You may need to adjust the flow from your reservoir or change the angle of your waterway. Keep an eye on your basin to make sure it doesn’t have mosquito-tempting standing water in it.
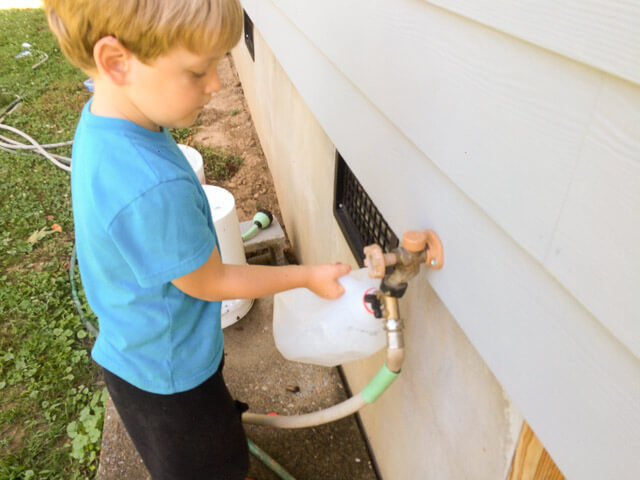
Refill the reservoir regularly.
When do you need to clean your waterer?
It depends! A layer of algae won’t hurt, and some beekeepers say their bees prefer “well-aged” water. However, if your water smells rotten, it’s time to dump it out and start fresh.
Bee Waterers 2.0 and 3.0
Since we weren’t seeing bees or butterflies in the first waterer after a week or so, I decided to create a couple more waterers with materials we had on hand. We can keep experimenting to find the setup that works best in our garden.
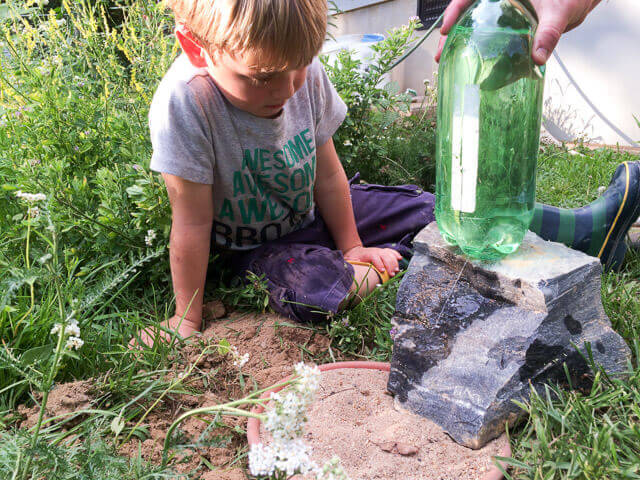
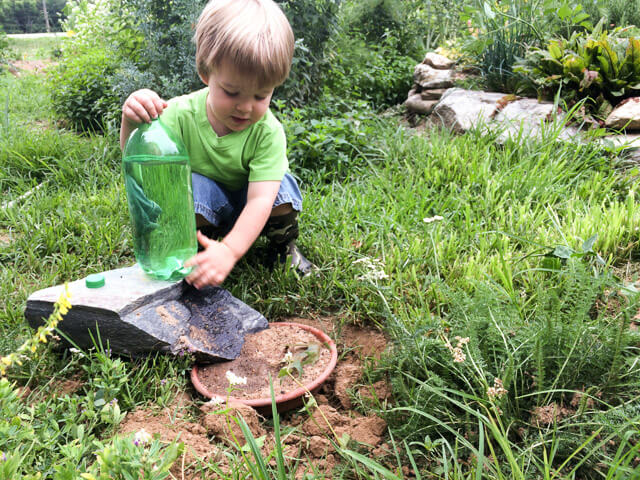
Version #2 – We used a 2-liter bottle from the recycle bin as the reservoir, and we found a rock with flat top and sloped side for the waterway. For the basin, we buried a plant saucer to its rim and filled it with sand. Overflow will seep into the garden around it.
Version#3 – This one shows how very simple the project can be! Colby and the boys made a big mud puddle a few weeks ago. I picked this bare area as the location of our third waterer.
I set the garden hose on top of a piece of broken concrete and turned on the faucet just a hair. Water drips down the block and into the muddy soil.
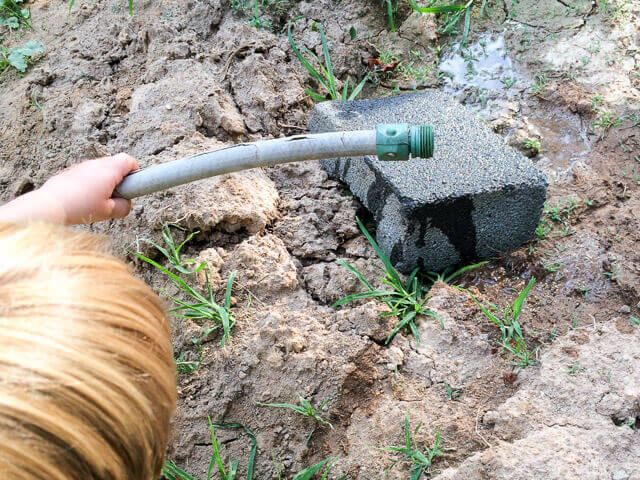
We’ll watch this one and turn off the drip if the mud puddle starts holding water. I think our resident toads will enjoy this watering hole, too.
Update on Bee Waterers
One year later…would I make these waterers again? Yes and no. 🙂
The project was fun and easy to do with the kids. While we didn’t see insects flocking to the waterers, we saw them occasionally and enjoyed the process of careful observation…discovering lots of interesting rocks, flowers, toads, and bugs along the way.
We did a good job refilling jugs through the heat of summer because we were near them often in the baby pool. I did find that putting on the lids was a mom job. You have to get the fit just right to keep it dripping without having a stream.
In fall, the task was out of sight and out of mind.
The mud puddle was just too tempting for the boys EVERY time we were outside. Now, I’m okay with mud, but some days, I want to keep our clothes change to once a day! So, the dripping hose experiment didn’t last as long. That said, a hose dripping down a board and fed from a rain barrel would be my favorite option when I can minimize the puddle (or keep my kids away from it most of the time!)
Finally, I discovered another water option when we added a bee hive to our garden this year.
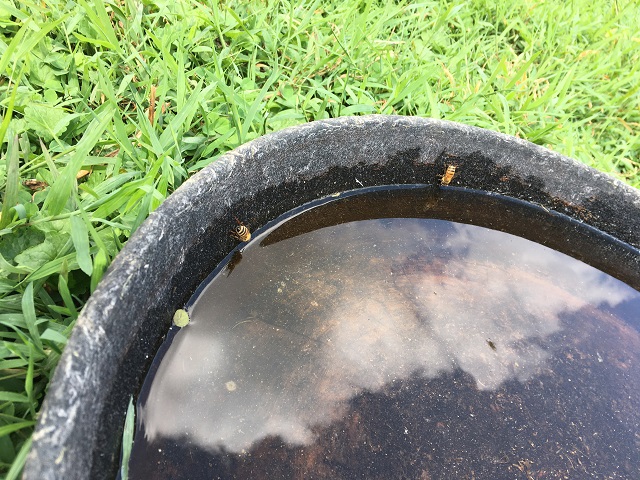
The honeybees drink from the rubber chicken water bowls! The rough sides are just right for getting down to the water without falling in. (I’ve seen only 1 dead bee in the water after 4 months or so.) Since we change the water every couple days, there’s no mosquito risk and it stays pretty clean. A nice simple solution!
Do you have a wildlife water source in your yard?
Tell me about it in the comments below. Build your own bee waterer and then let us know what you create!