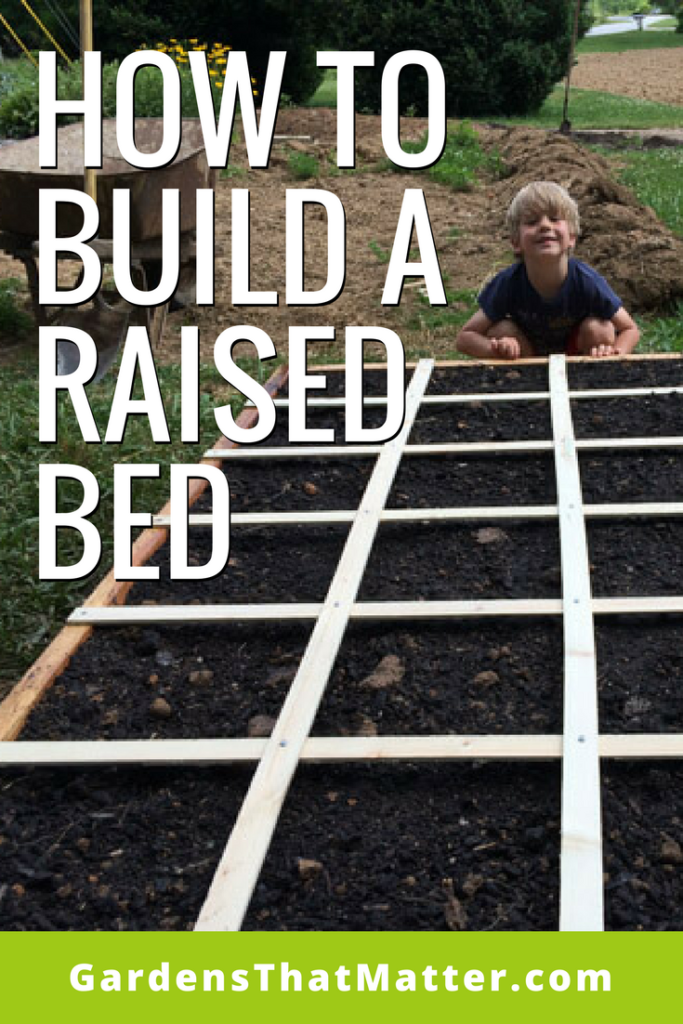
How to Build a Simple Raised Bed
Start gardening this weekend with a simple raised bed your kids can help you create.
In this tutorial, I’m going to show you how we built a raised bed with three kids (under 5 years old!) in one weekend.

Why a Raised Bed?
To be honest, we wanted a raised bed for one main reason…kids are less likely to step in it! Raised beds give kids clear boundaries. They aren’t surmountable, but the edges do give it a structure our kids respect more than the in-ground beds nearby. Here are a few more reasons we like raised beds:
- This design is easy to build.
- The raised bed provides good drainage. No soggy conditions for plants or people.
- We can choose our soil, and mix up a blend that we know plants will thrive in.
- The defined space makes garden chores, like weeding and watering, feel doable. Enjoyable, even!
- Colby loves the aesthetics and uniformity of the box and grid. (I get that…I’d have a jungle of a garden if left to my own devices. 🙂 )
- We can repeat the pattern and have a modular system. Additions like row covers or protective caging can be moved between boxes.
- We can keep the soil healthy with less disturbance (digging/tilling) and no compaction from walking on it.
The Grid and the Guru
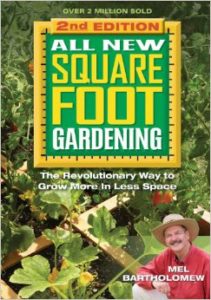 Our grid is fashioned after the raised bed system made famous by engineer-turned-gardener Mel Bartholomew and his book Square Foot Gardening (public library).
The square-foot grid makes it easy to plan your garden, lets you see exactly how much can be planted, helps you learn about spacing, and makes it easy to replant and rotate crops. Plus, it looks tidy, even if the rest of your yard isn’t! The grid is just one part of Bartholomew’s simple, no-fuss approach to gardening.
Sadly, Bartholomew passed away in April 2016 at the age of 84. He has inspired millions of gardeners, and we admire him greatly. He was able to do something that is very hard to do. . .ease the overwhelm of starting a garden.
Although we don’t follow Bartholomew’s approach exactly, we do believe it has tremendous value. If you’ve never had a garden before and you like to follow recipes, Square Foot Gardening is a good way to start.
One Weekend, Really?
Yes, really! It feels great to knock out this project in just a couple of days, but if you need longer, don’t stress. You can break it down over a couple of weekends.
Here’s an overview of the steps and how the timeline worked out for our family. (*Stars* indicate steps our kids helped with during the project.)
Friday Evening (or another evening the week before)
- Select Site*
- Choose the Size
- Decide on Soil
- Plan the Plants*
Saturday
- Gather Supplies* (You can buy these through most home improvement and garden supply stores. If you don’t have great selection in your town, work through this step in advance and order anything you can’t source locally.)
- Prep for Building
Sunday
- Build the Frame*
- Prepare the Site*
- Assemble the Grid* (This should probably get half a star, since we started it during naps!)
- Fill with Soil*
- Time to Plant!*
Let’s Dig In!
Step 1: Select Your Site
First, find a level spot that gets 8 or more hours of sunlight. (You can get away with 6ish if you’re mainly growing greens and/or root crops.) Choose a site near a water source and away from trees and large shrubs that might shade your plants.
Bonus points if you pick an area you visit daily. Choosing a site near your main walkways, kids’ play area or mailbox means you can enjoy your garden regularly and spot any problems before they get too big to handle.
We picked a site in our backyard that gets about 9 hours of sunlight in summer. It’s close to our herb garden, the kids’ play area and “Grandpa’s Garden”—definitely a high-traffic area!
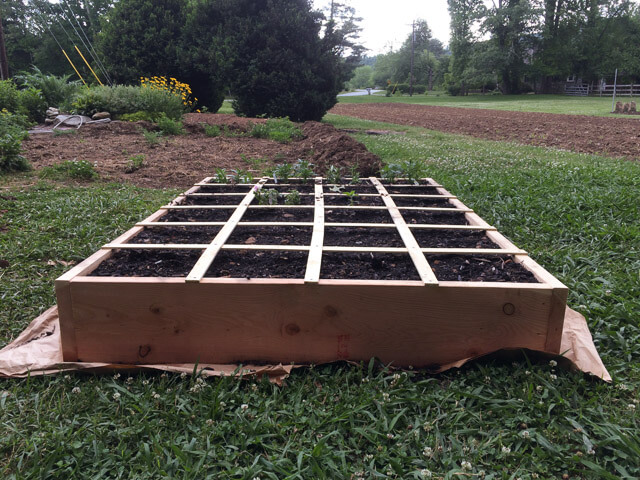
Step 2: Choose the Size
We’re building a 4×6-foot raised bed that is about 10 inches deep. It includes the removable grid. You can adjust sizes based on your space and any materials you have on hand.
A few notes about size:
- Work with standard lumber lengths. For example, you can buy 8, 10, or 12-foot boards at most stores and easily cut these in half for 4, 5, or 6-foot lengths, leaving little waste.
- Don’t make it wider than you can reach. Most of us can reach comfortably across a 2-foot span, so a 4-foot wide bed with access on both sides works well.
- Keep length under 8 feet for simplicity. If you opt for an 8-foot or longer bed, you’ll need to add stakes or cross-pieces for support in the center. Plus, shorter beds are more convenient to walk around.
- Choose a height of 6-inches or more. Most vegetables roots grow in the top 6 to 24 inches of the soil. If you prepare the soil under your bed, OR if you use a professional potting mix (see Soil Options below), you can get away with a shallower bed. Otherwise, you’ll want to go deeper. We chose a 10-inches which allows plenty of room for most crop roots and a layer of mulch on top.
- Use what you have! We had 6-foot lath material, so we chose a 6-foot length.
- Try it on for size. Use a garden hose to outline the shape of your bed in the yard. Does the size work in the space you have?
Step 3: Decide on Soil
Next, you need to decide what you’ll fill your bed with. Add anything you’ll need to purchase to your shopping list.
Option 1: 1/2 Native Soil + 1/2 Compost
You can use this option if you know a enough about your soil to add necessary amendments. (Or if you’re willing to learn.) The compost will add organic matter to feed your soil, hold water, and help with drainage.
Your local composting facility may even offer a topsoil or garden blend. If you can find one that is approved for certified organic gardens, you’re golden.
Option 2: Professional Potting Mix
(Or “Mel’s Mix” of 1/3 Compost + 1/3 Vermiculite + 1/3 Peat Moss)
If soil prep seems confusing or if you know your soil needs LOTS of work, you can start with a potting mix instead. You’re basically filling a giant container with a mix that has nutrients, holds water, and drains well.
If you’re leaning toward Option #2, you should definitely check out Mel Bartholomew’s All New Square-Foot Gardening, where he describes his “Mel’s Mix” in detail. It works, but it is usually more expensive and less sustainable than working with local soil and compost.
We used Option #1 with half native soil from a hole in our basement (long story…) and half compost. We’ve done a soil test and know what amendments to add to make it work well for veggies.
How Much Soil?
You’ll need 18 cubic feet (or 6-ish wheelbarrow loads) of soil to fill a 4×6-foot bed to a depth of 9 inches. This leaves room for some mulch on top. (Different size bed? Calculate your soil needs.)
Step 4: Plan Your Plants
What will you grow in your raised bed? Start with a mix of food (and flowers) for your table, food for beneficial insects, like bees and lacewings, and food for your soil. Many plants overlap categories.
Food for Your Table
Radishes are a quick win. Our first spring planting was ready to eat 3 weeks later!
The key to choosing vegetables and herbs is to pick the ones you already eat. If you buy carrots by the bunches, plant them! On the other hand, if you don’t usually eat beets, you should not grow a dozen of them.
Radishes are a quick, kid-favorite that you can start almost any time of year. Carrots and kale can also be planted in spring, summer or fall. Good candidates for a summer garden are tomatoes, peppers, eggplant, okra, basil, and beans of all sorts.
You could try lettuce or other greens, but you may need to harvest them small since they tend to bolt, or start flowering, and get bitter in the heat.
Food for Beneficial Insects

Mints provide food for pollinators and bright, fresh leaves for us to eat, too.
Welcome predatory insects and pollinators into your garden by planting their favorite foods. These flowers often double as beautiful bouquets for your dinner table.
Ladybugs, lacewings, hover flies, and predatory wasps often eat pollen and nectar as adults. Their young larvae chow down on aphids, caterpillars and other common garden pests. Try dill, fennel, yarrow, zinnias, mallows and mints for these friendly bugs.
Our favorite bee and butterfly plants offer lots of pollen and nectar, too. Sunflowers, cosmos, asters, coneflowers, bee balm and anise hyssop are in our garden plan. We love the BeeSmart Pollinator Gardener app from the Pollinator Partnership. Check it out to find more plants that are well-suited for your region!
Food for Your Soil

Deep-rooted comfrey grows fast. Chop it down for compost or mulch and it will grow right back!
These crops produce leaves and stems that you can dig into your soil, use as mulch or add to your compost. Here are a few examples:
Beans, peas, clover and lupines are legumes. With the help of bacteria in their roots, they fix nitrogen from the air into plant-available forms.
Comfrey is a fast-growing perennial that can cut back without harm. The trimmings can be used as mulch or added to a compost pile.
Buckwheat is a fast-growing crop with flowers that are great for beneficial insects. We’re going to try filling gaps in our garden with buckwheat this season, being sure to chop it down for mulch or compost before it sets seed.
You might even intentionally plant a fast-growing leafy “weed” like amaranth or lamb’s quarters. You can “chop and drop” in place where they’ll break down and feed your soil.
Debating whether you should buy seeds or seedlings? Here’s a primer on the topic.
Step 5: Gather Supplies
Here are the tools and materials that we used.
Tools
- Digging fork
- Water hose or stakes for marking location
- Drill
- 1/8 inch pilot drill bit (or) #10 countersink bit
- 3/16 inch drill bit
- Tape measure
- Pencil
- Carpenter square (or other straight edge)
- Saw (or a hardware store that will cut the wood)
- Safety glasses
- Wheelbarrow, buckets or tarp for mixing and moving soil
- Shovel
- Seeds and seedlings
Materials
- Two 6-foot 2x10s
- Two 4-foot 2x10s
- Three 72-inch lath boards
- Five 51-inch lath boards
- Twelve 3-inch exterior screws
- Sixteen 1-inch exterior screws
- Fifteen #10 3/4-inch round head stainless machine screws
- Fifteen #10 nuts
- Fifteen #10 washers
- Newspapers or cardboard to cover bottom of bed
- 18 cubic feet of your soil mix of choice
A few notes about materials:
- You can use pine, cedar, redwood, or engineered wood, just don’t use treated. Pine is the cheapest and will last 5-7 years. Cedar, redwood and engineered wood will last longer.
- We chose 2x10s over 1x10s for sturdiness. They are less likely to warp in the middle and don’t need any center supports when under 8-foot lengths.
- On a sustainability scale, the best wood is free, repurposed wood. FSC-certified lumber is your next best bet.
- Lath boards are a very economical way to create your grid. They are usually 1 1/2 inches wide and 1/4 inches thick. They aren’t always perfectly straight, so you have to pick through them (or not care). If you have a table saw, you can cut your own grid boards out of scrap.
Step 6: Prep for Building
Make sure your work space is organized and safe.
Clear or set up a large, flat surface to work on (for example, a driveway, deck, or sheet of plywood on sawhorses). You can build right in the bed’s final destination if it is flat.
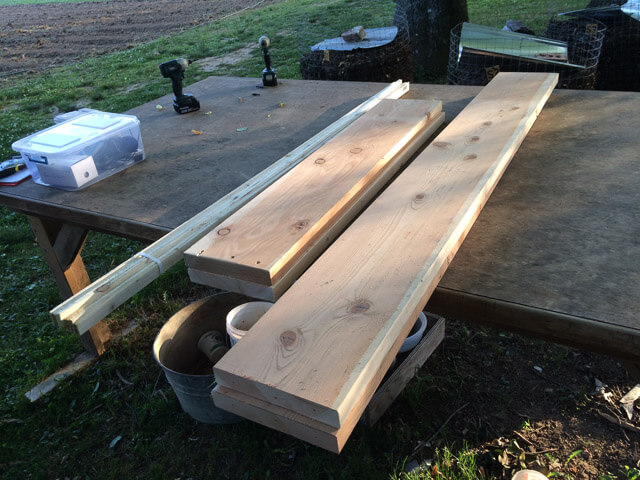
If you bought longer lumber, cut all your boards to the necessary lengths.
Lay the two 6-foot boards down flat, measure ¾ inch from each end and make a line. This is where the screws will go.
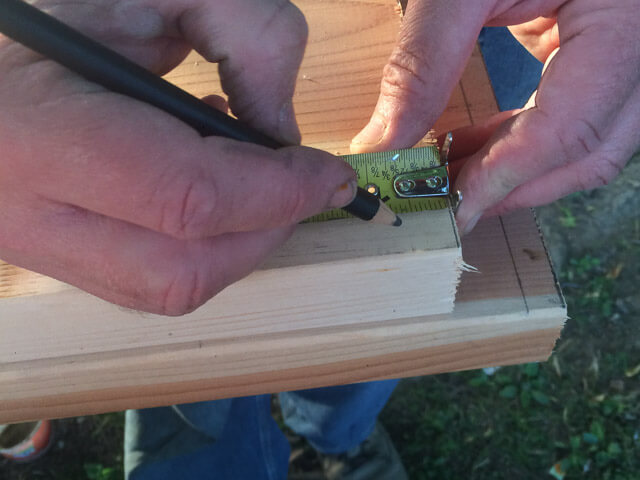
Drill three evenly-spaced ⅛-inch pilot holes along the lines. (You will have 6 holes per board, 12 holes total).
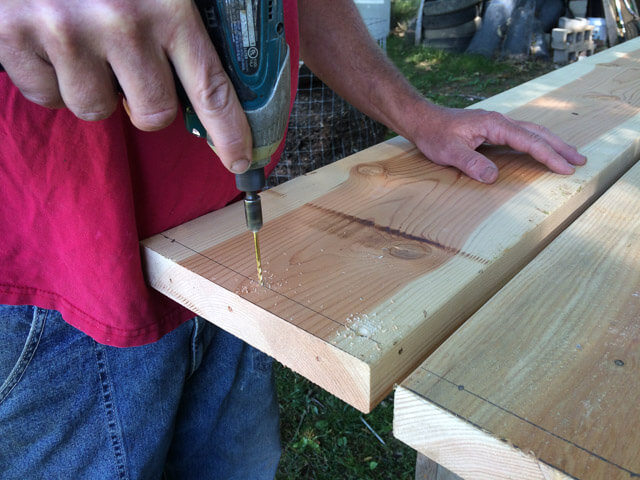
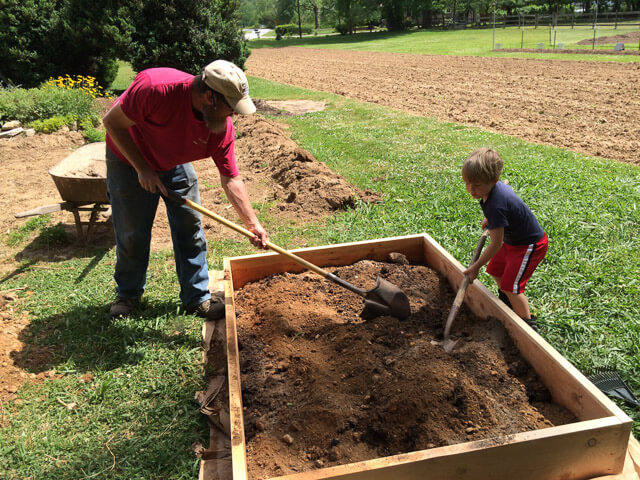
Step 7: Build Your Frame
Next, set all four boards on edge to form a rectangle. The 4-foot boards sit inside the 6-foot boards.
Use the 3-inch exterior screws through the pilot holes into the ends of the 4-footers. Bring all four corners together using the 3-inch exterior screws.

Step 8: Prepare the Site
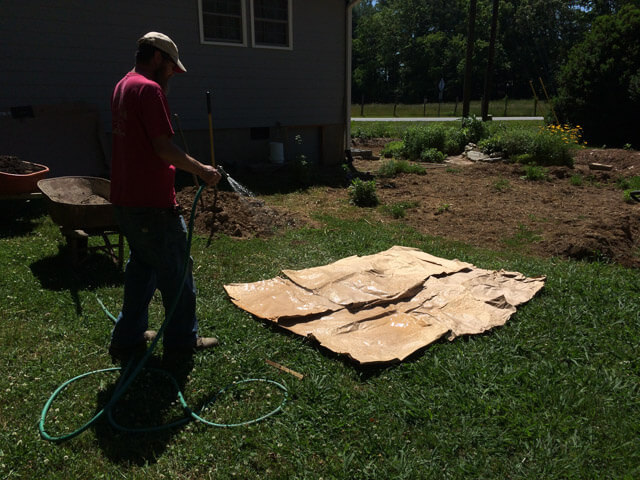
Now, measure and mark the bed site with stakes or a garden hose. Chop and drop any large weeds in the area. No need to remove all the vegetation; we’re going to cover it up in a moment.

If your soil is compacted or heavy clay, use a digging fork to loosen the ground. (Hint: you may want to water the night before to make this easier!) This is optional, but it will help improve drainage.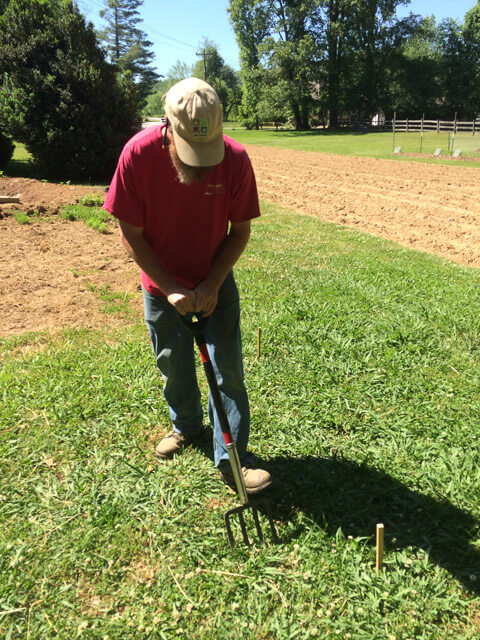
Now, you want to cover the area with a weed barrier. Wet it down, if needed, to keep it from blowing away.
We used old paper feed sacks. You could use several layers of newspaper or cardboard. I prefer these natural materials because they break down over time, allowing worms and other soil life to move in and out of the bed.
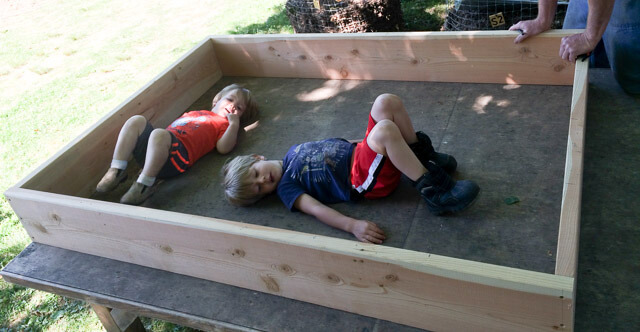
Move the frame into place.
Step 9: Assemble the Grid
On all 4 sides of your frame, make a mark every 12 inches with a pencil.
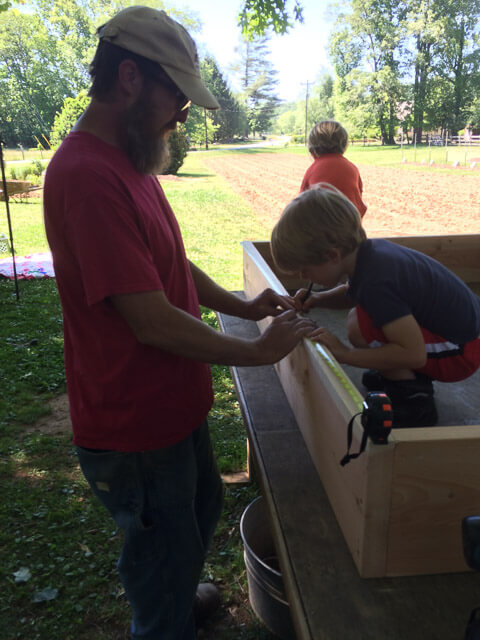
Psst! Be sure to start measuring from the end of each board, not the corner of the box. The spaces on the outside ends of our grid will end up being a little smaller than 1×1-foot squares. Remember, we chose a 6-foot length (due to the 6-foot lath) and placed the 4-foot boards on the inside. This means our interior dimensions are actually 4 feet x 5 3/4 feet. It bugs Colby, but the plants don’t mind. 🙂
Start with the five 51-inch lath strips (51 inches) and lay them across the frame, centered over the pencil marks on either end.
Drill a ⅛-inch pilot hole. Attach the 5 strips to the frame using 1-inch exterior screws.
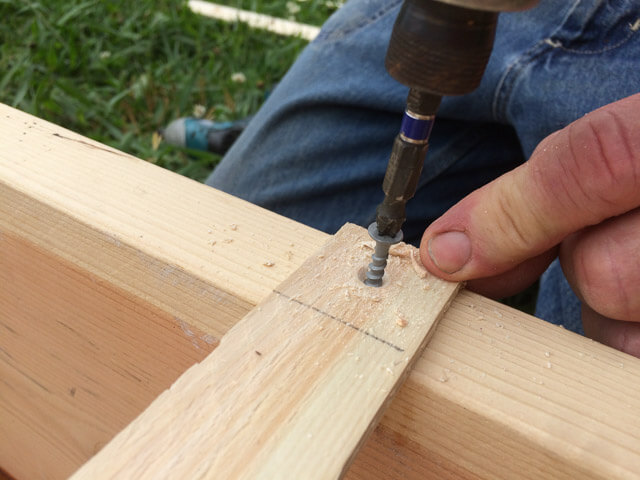
Do the same with the three 72-inch lath strips. Pilot holes, then screws.
Be careful not to drill screws too aggressively. Even with the pilot hole, the thin wood will split if too much pressure is applied.
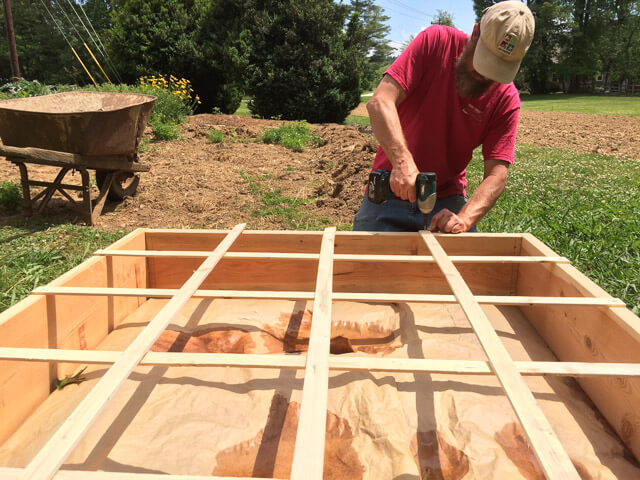
Taa-daa! You have a grid. Let’s connect the intersections.

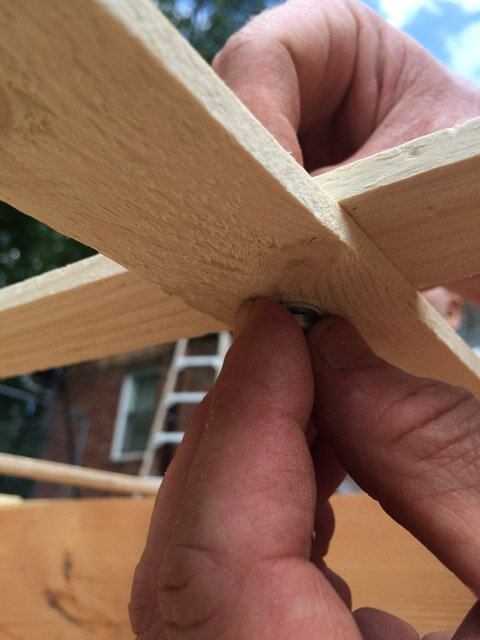
Drill a hole in each of the 15 intersections with a 3/16-inch bit.
Insert #10 ¾ inch stainless machine screw into each hole. Then, attach washer and nut underneath.
Now, remove the grid and set it aside while we fill the bed with soil. Simply unscrew the 1-inch screws on the perimeter.
Step 10: Fill with Soil
Layer in your compost and soil, mixing well and watering it lightly as you go. You want a finished soil mix that is moist, but not dripping.
Reattach your grid.
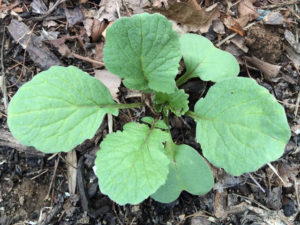
Step 11: Time to Plant!
Now, you can plant your seeds and seedlings.
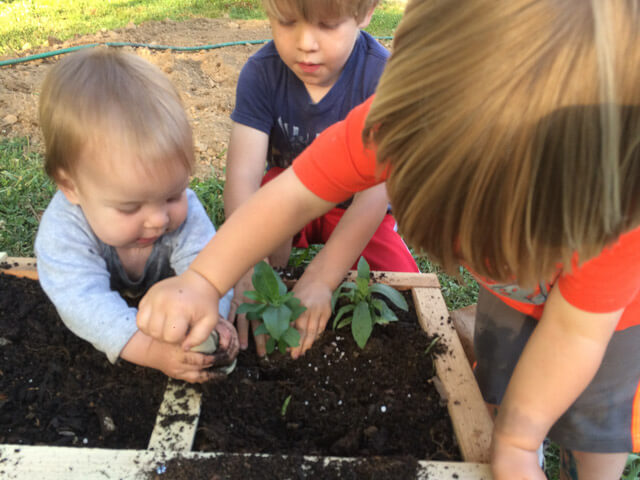
If you want help with spacing, look for the “Thin to __ inches” on your seed packs. Use this number to help decide how many to plant in each square. Here are a few examples:
- Our carrot seeds say “Thin to 3 inches,” so we can plant 16 carrots in a single square.
- Bush beans get thinned to 4 inches, so we can plant 9 per square.
- Lettuces need 6 inches, so we get 4 per square.
- Broccoli need 12+ inch spacing, so we have room for 1 per square.
Keep your seed beds moist with frequent shallow watering. We sometimes use a burlap bag or light layer of mulch on top. You can mulch around transplanted seedlings, too.
Where Will You Grow Next?
In today’s step-by-step instructions, we’ve looked how to build a simple raised bed. Now, I’d love to hear from you in the comments below.
Would a raised bed fit into your plans for starting or expanding your garden? Have you grown in raised beds before? And if so, how did it go?
If you know someone who could benefit from this tutorial, please like and share!
I used wood 5 years ago…discarded it this March and used concrete blocks. My raised bed was complete in 30 minutes. It is the way to go. Easy to move if necessary, can double stack for tomato support.
I built my 11 raised beds pretty much the same way from 2″x12″x10′ kiln dried pine. However, the 3 deck screws at each corner would warp out due to frequent watering here in the high desert. I put 2 “L” brackets inside each corner for additional support. I then placed a 1/4 ” dripline (6″ emitter spacing) in a 1 foot grid on top. It irrigates adequately and works as a spacing grid as well. I made the irrigation grid 3’x5′ to fit inside the 4’x6′ bed. Thought about concrete block, but had concerns about leaching. Raised beds are the only way to go. Try the 3 Sisters method (corn, beans and squash/melons) in one bed. Good yield from one 4×6 bed. Very efficient.
I like your suggestion of concrete blocks, Jj! We’ve used (filled-in) concrete blocks for simple cold frame and liked how they retained a little heat. Do your raised beds warm up early in spring with the “heat sink” effect of the blocks?
I like your suggestion of concrete blocks, Jj! We’ve used (filled-in) concrete blocks for simple cold frame and liked how they retained a little heat. Do your raised beds warm up early in spring with the “heat sink” effect of the blocks?
Thanks for sharing your experience and approach, DanBob! The L brackets and driplines are both great additions. I like how you set your dripline to work as your spacing guide, too! Would love to see a picture of your 3 sisters raised bed! 🙂
Don’t know; I just cleaned the area of old raised beds last October and assembled block raised bed in March.
I had verticillium wilt and lived to tell it!!! My tomato plants and tomatoes (green) are the prettiest I have ever had-no blemishes/no spots/no irregular shaped fruit. ‘Actinovate’ is a miracle. The wilt killed my tomato plants for 4 years and with destroying the wood, replacing the soil and using Actinovate I have recovered.
It is expensive but I like going outside and picking my tomato from my own garden that much.
My project this spring is to build a raised bed in the front yard where there is still sunlight. This doesnt look too hard. Could you send the boys to help? Haha.
You could definitely do this project, Jojo! The boys would love to help, but I bet you can round up a few small “helpers” with a shorter commute. 😉 <3 from all of us!
Looks like a great idea for us. Guess Uncle Kenny needs to get busy!!
Yay! Then, you can fill it with deer-resistant herbs & veggies. 🙂