How To Grow a Tomato in a Container
I love eating tomatoes from the summer garden, but it took me awhile to come around.
I used to HATE raw tomatoes. Blech! I pushed the bland, watery wedges to the edge of my salads and peeled the red, round slices off hamburgers. I just didn’t get it.
Then, I grew my own tomatoes…
And homegrown tomatoes changed my mind (with a little help from basil and mozzarella).
If you want the deliciousness of homegrown tomatoes, but you have limited space or poor soil, growing tomatoes in pots is your solution.
Ready to grow almost anywhere! Here’s how to plant a tomato in an inexpensive container like this one.
In this tutorial, I’ll share how you can grow tomatoes in an inexpensive storage container. This is a simple project your whole family can do in an afternoon.
Here’s What You Need:
- 20-gallon tub
- Coarse vermiculite – 5 gallons, or just under 1 cubic foot. (We called around and found the best deal on a 4-cubic-foot bag from a local ag store.)
- Coconut coir – 5 gallons, or about 4 pounds. (We ordered a compressed 10-pound brick. Peat moss is a less sustainable choice, but it would work here, too.)
- Compost – 8 gallons, or a little more than 1 cubic foot. (If you’re buying compost, look for a blend or buy two different kinds to mix.)
- Optional: You can buy a pre-made potting mix instead of the last three ingredients. You’ll need 72 quarts, or about 3 cubic feet.
- A determinate tomato plant
- A tomato cage
- Mulch – 3 gallons. (We’re using shredded leaves from last fall.)
- Drill
- 1/4-inch drill bit
- Wheelbarrow or tarp
- Shovel
- Scissors (for trimming lower leaves off plant)
- Water
Step 1. Select Your Location.
Choose your tomato-growing site. Then, you’ll know how many containers you have room to add.
- Tomatoes do best with about eight hours of sunlight a day, although the minimum for growth and fruiting is about six hours.
- In many places, your tomato can be planted in full sun.
- If you live in the Deep South or a hot, dry climate, your tomatoes will benefit from some afternoon shade.
- Pick a place you pass often. Containers need regular attention and watering.
Step 2. Prepare the container.
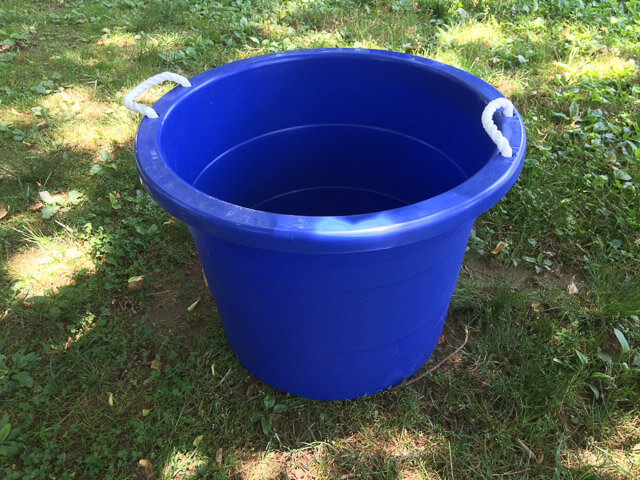
We chose this 20-gallon storage container for its size and price ($8). Larger containers, like this one, hold more soil and moisture. You can find large planters, but they are more expensive ($30-40).
(Side Note: Do NOT try to pick this container up by the handles when it is full…trust me, those handy ropes are not for heavy lifting!)
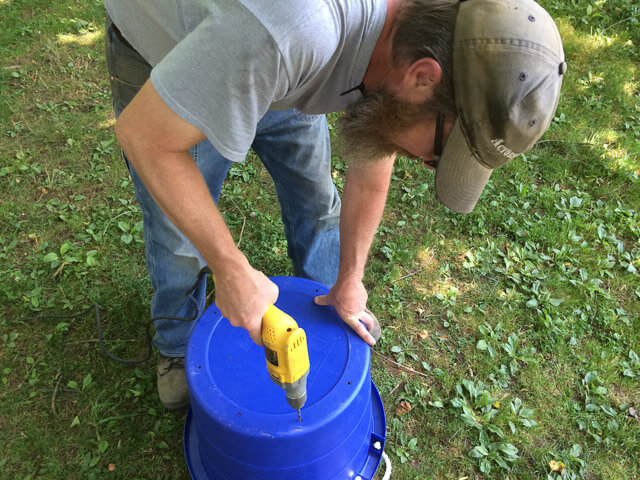
Drill 10-12 holes in the bottom using a quarter-inch drill bit.
Step 3. Make the potting mix.
(If you purchased pre-made potting mix, fill your container halfway and go to Step 4.)
We are using a homemade potting mix that is lightweight and holds water well. Since we can add our own compost, it is less expensive than pre-made potting mix. Plus, we can source organic materials.
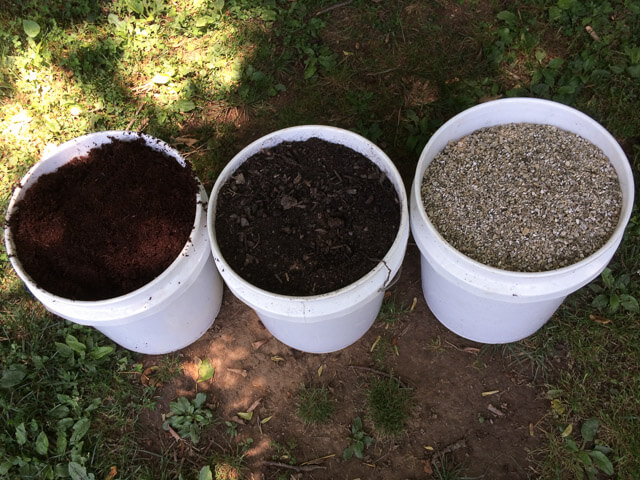
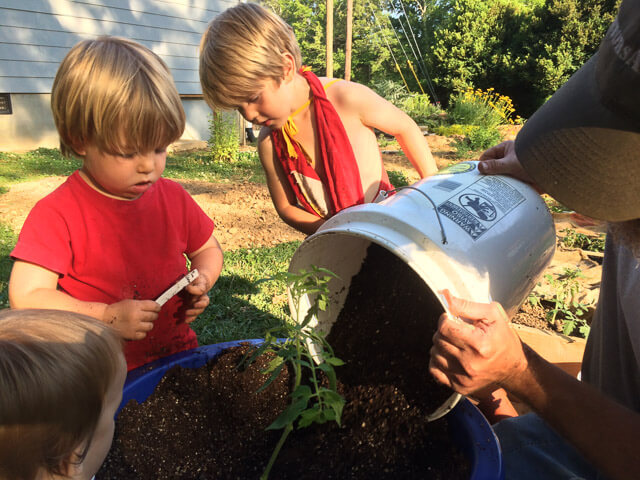
Use a 5-gallon bucket to measure one bucket each of coconut coir, compost and vermiculite into a wheelbarrow (or on a tarp). Add another half-bucket of compost to the mix.
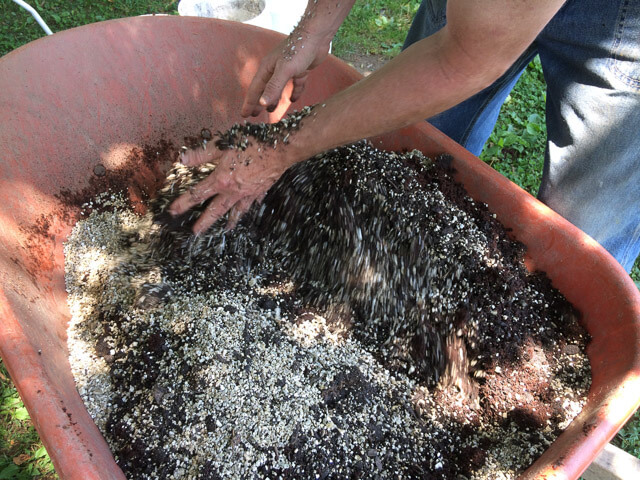
Mix it well and fill your pot halfway up.
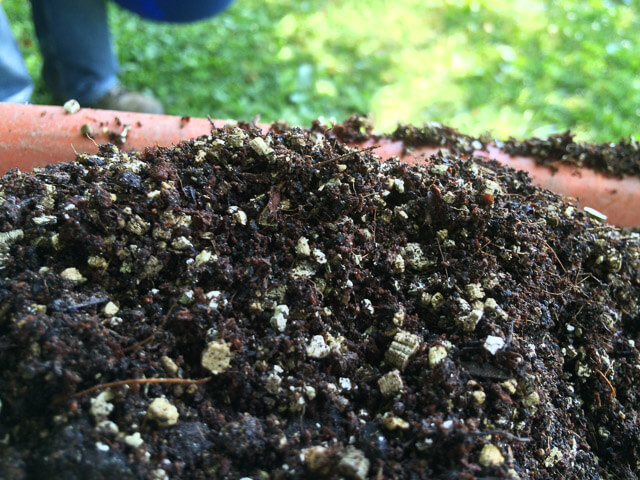
A closeup of the finished mix.
Step 4. Add tomato-boosting amendments (optional)
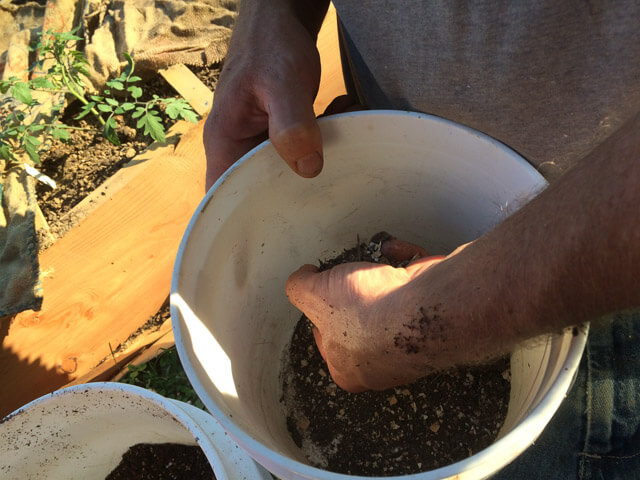
Whenever we plant tomatoes, we add a little extra love in the bottom of each planting hole. The mix is our garden version of a casserole. It changes based on the amendments we have on hand. This season’s mix includes the following:
- Dried, crushed egg shells
- Azomite rock dust
- Mycorrhizal spores
- Biochar
- Additional compost
Step 5. Plant the tomato.
Our seedling is a Plum Crimson, which is a determinate hybrid variety.
Determinate tomatoes are usually shorter, bushier plants that bear one main harvest of fruit. These compact plants are easier to manage in a container than the vining indeterminate varieties, which can grow over eight feet tall. (On the other hand, a benefit of indeterminate tomatoes is the way they bear fruit continuously through the growing season. Just be ready to prune and train the vines if you go with indeterminate!)
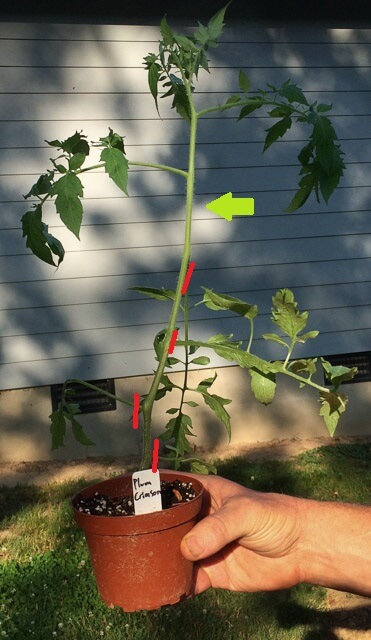
We kept this seedling in a shady spot for a couple weeks, and you can see how leggy it grew. (Red = leaves trimmed off. Green = soil level after transplanting.)
We bury our seedling deep. Tomatoes can grow roots all along their stem. When we plant most of the seedling underground, we’ll get a strong root system in return.
- Trim off leaves on the bottom half of your plant.
- Remove the seedling from its pot.
- If your seedling’s roots are circling, tease them loose.
- Place your seedling into the hole, keeping 2 or 3 sets of leaves above the soil level.
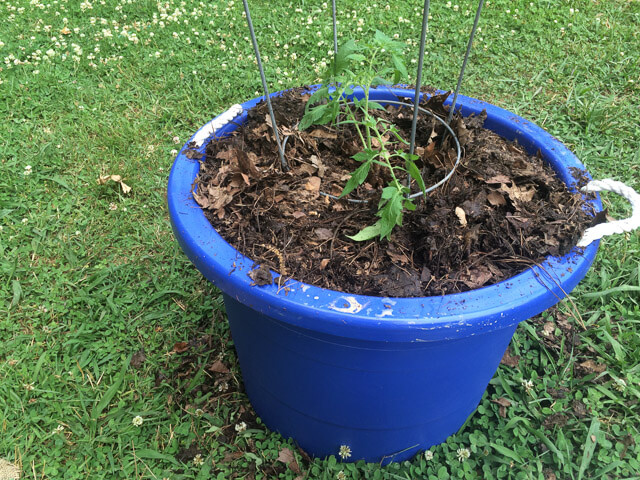
Topping off the container with soil mix. And yes, a cleverly wrapped cape is perfectly acceptable garden attire.
Fill in around the tomato with the rest of your potting mix. Allow space at the top to add mulch a little later.
Step 6: Add Support.
Push your tomato cage into the container around the plant. It will support the plant as it grows and keep leaves and fruit off the ground.
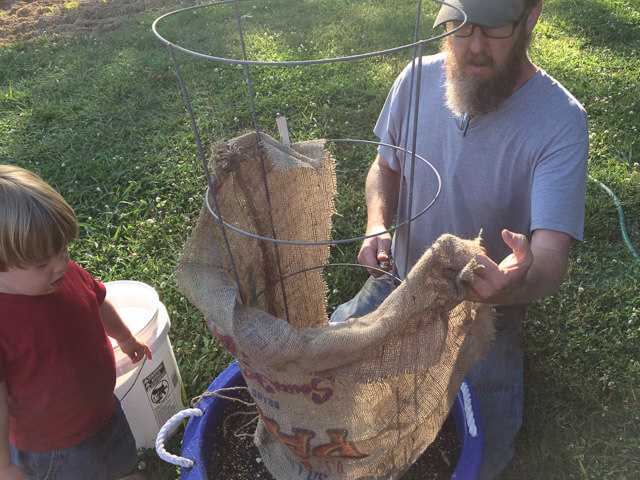
You can also use the cage to add some southwestern shade while your seedling gets established. If you live in an area where tomato pests are a problem, you can even use the cage to support protective row cover material.
Step 7: Water.
Optional: Add a Mini-Irrigation System,
Water your seedling well after planting. Then, aim to keep the pot damp but not soaking wet.
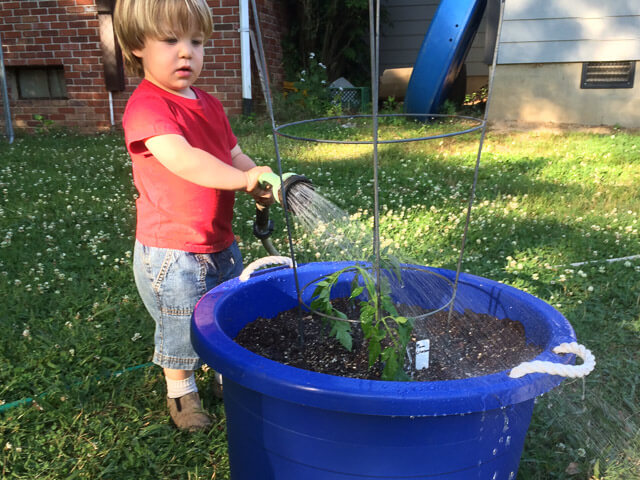
When possible, keep the water off the tomato’s leaves. Wet leaves are more likely to get blight and other fungal diseases.
Containers tend to dry out more quickly than in-ground plantings. Be sure you pass by the container regularly to check on it. We’ve got our container near a raised bed, and we can hand water both at the same time.
If life is crazy and you won’t be able to water regularly, add a mini-irrigation system. Use a timer and drip emitters or a soaker hose, and you’ll know that your plants are always getting the water they need.
Step 8: Add Mulch
Add a couple inches of mulch to the top of your container to help conserve moisture. We’re using shredded leaves. You could also use pine needles, straw, or even shredded paper. Layer it on top of the soil.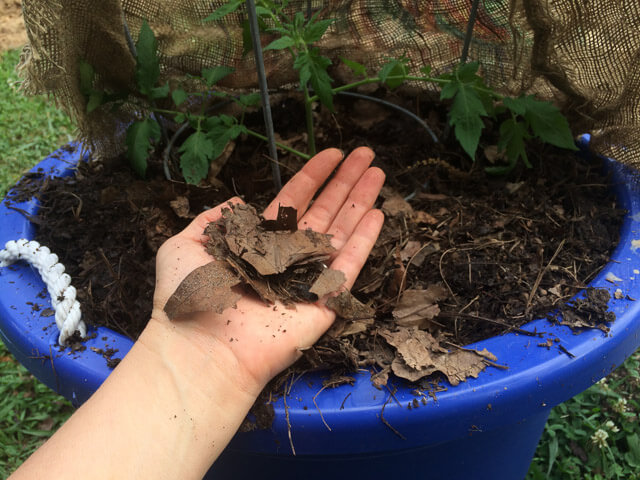
Have you grown tomatoes in a container before? What is your favorite tip for keeping tomatoes healthy in pots? Tell me in the comments below.
This is excellent information, Amy – thank you! I love how you are doing this with your kids interacting and helping out. Such valuable experience for them.
I had no idea that you can plant a tomato that deep, and cut that much off, and it will thrive even better! I look forward to seeing this plant in a few weeks to see how it’s grown.
Also, are the materials for mixing up that perfect soil very expensive? I always feel overwhelmed at the idea of buying all that stuff and mixing it just right.
Thanks, Andrea. 🙂 With kiddos as helpers, things don’t always turn out like I plan, but I love seeing them getting their hands (and entire bodies) in the dirt.
We made 18 gallons of the mix for about $14, buying the vermiculite and coconut coir. Our compost was made from free kitchen and yard waste. (For reference, the same amount of pre-mixed potting soil ranges from $20-30, depending on which kind you choose.) We mix based on volume, but think of it as more like cooking than baking. We’ve found that most plants are fairly adaptable to less-than-perfect soil.
When you’re thinking about soil, the simplest (and best) option is to work with what you have. A soil test can help you decide what amendments are necessary, and then you can cycle most of the nutrients with compost. Ideally, we try to limit what we need to bring into the farm from the outside. It saves us money and it’s more sustainable.
In containers, we want something lighter than our mostly-clay soils, so we opted for a “soil-less mix.” The coconut coir and vermiculite are naturally light weight. By adding more compost each season, we’ll be able to reuse the potting mix for years to come, which makes the expense worth it for us.
Interesting idea, Amy. We are in between homes at the moment, so I’ll have to re-establish
my garden beds all over again. I’m considering using the sheet mulching this go round since I have all of the materials and wonderful Georgia red clay. But the muck bucket (that’s what we call that type of container in Louisiana), may be what I need to get me through this summer for tomatoes. At any rate, I’m going to give this a try. I would suggest that a calcium source (e.g. egg shells) is critical for the tomatoes. It’s a very important “optional” amendment unless you like dealing with end rot.
Thanks for the idea. Loved the composting videos too!
Jeff